Creating a menu in an Android app can improve user experience by giving users easy access to various options and activities. This blog will walk you through the steps of making a menu button in Android Studio, including how to add a drawable icon, create a menu, and use viewBinding to implement click functionality. Now let’s get started!
Step 1: Adding a drawable icon for the menu
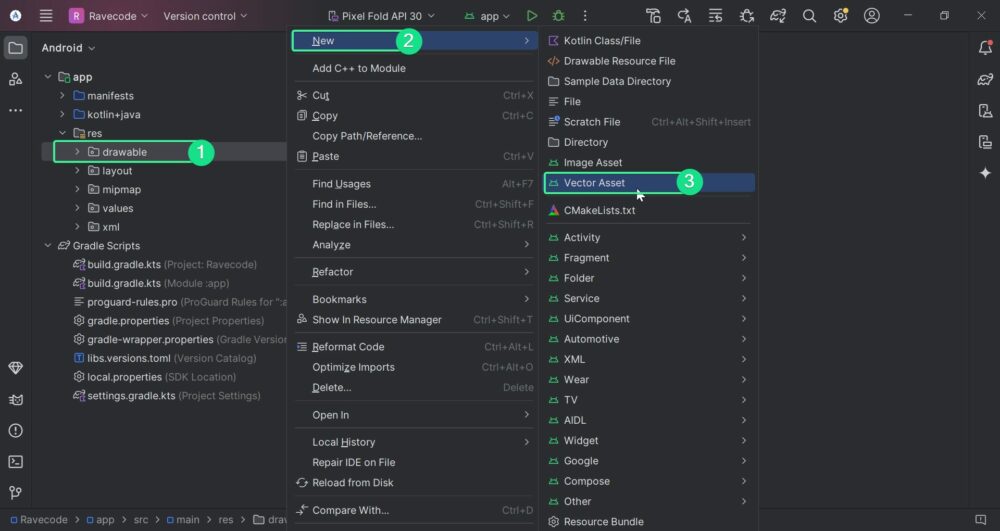
In Android View of your project, navigate to “res” → then Right-click on “drawable” → “New” → “Vector Asset”.
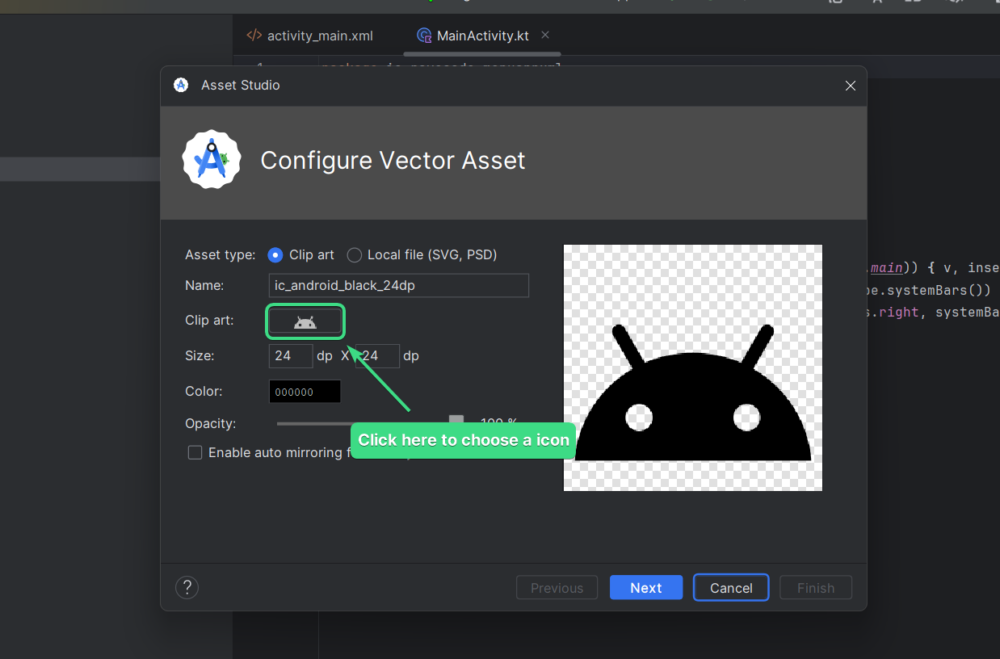
Click on the icon of the “Clip art:” section to open the many library window, where you can select the menu icon.
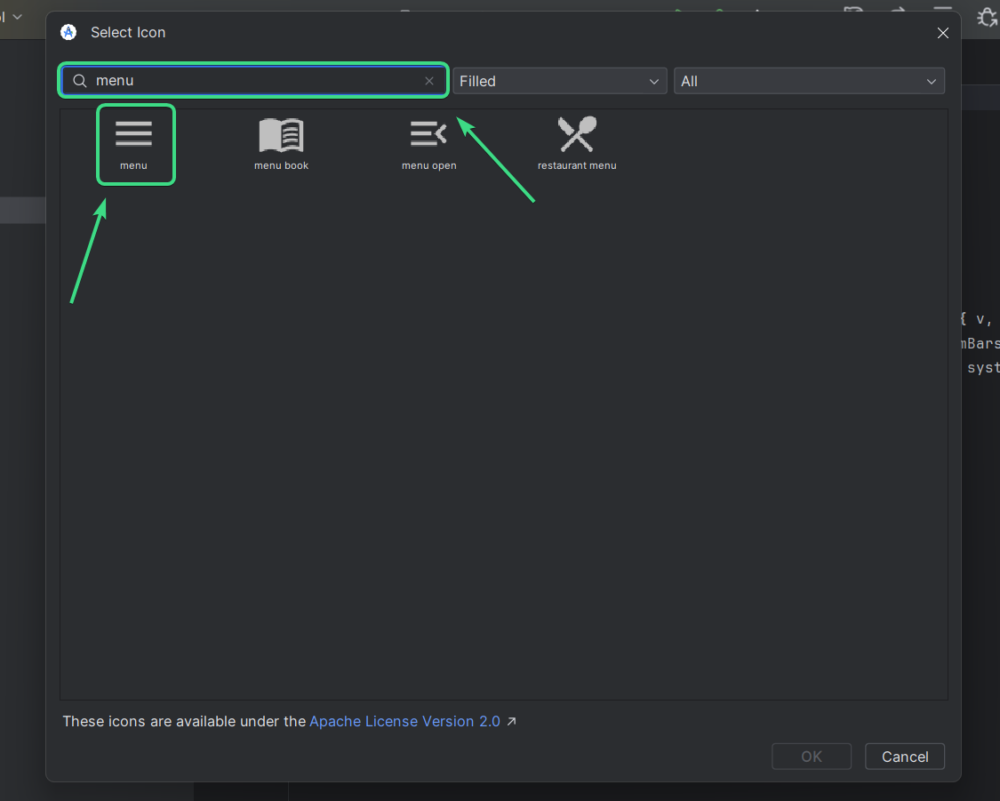
Search for “menu” and select the menu Icon. Once selected, click on “OK”.
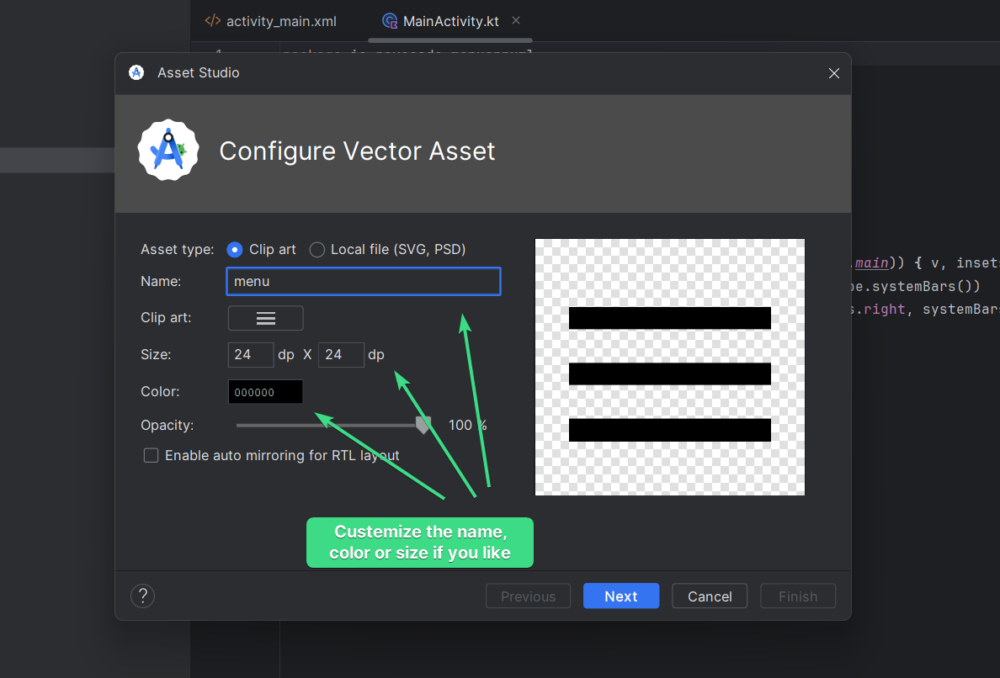
Customize the name, size, color and other details as you like. Once ready, click on “Next” → then “Finish”.
Step 2: Adding the menu button in activity_main.xml
Open activity_main.xml and add a RelativeLayout to contain the toolbar. Inside RelativeLayout, add a Toolbar and an ImageView for the menu icon.
<RelativeLayout
        android:layout_width="match_parent"
        android:layout_height="wrap_content"
        android:layout_marginTop="10dp"
        android:id="@+id/toolbar">
        <ImageView
            android:layout_width="38dp"
            android:layout_height="38dp"
            android:layout_marginEnd="10dp"
            android:src="@drawable/menu"
            android:id="@+id/option_btn"
            android:layout_alignParentEnd="true"
            android:layout_centerVertical="true"/>
</RelativeLayout>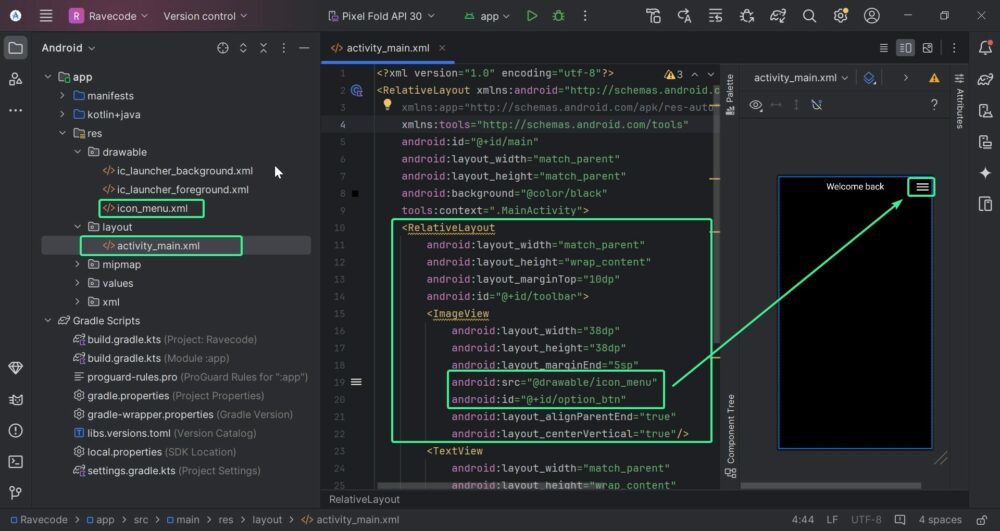
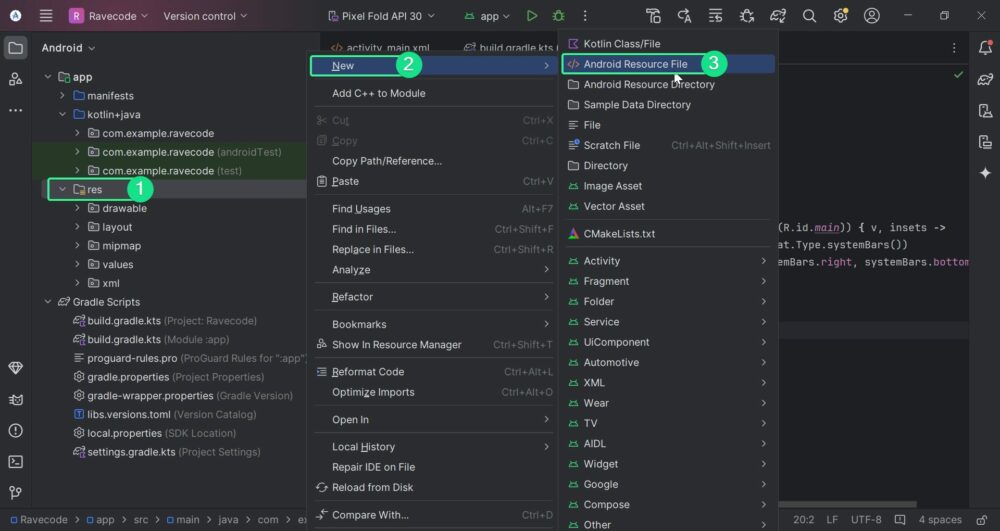
Step 3: Creating the options menu
Step 3.1: Creating the new file
Right-click on the “res”, select “New”, then “Android Resource File”
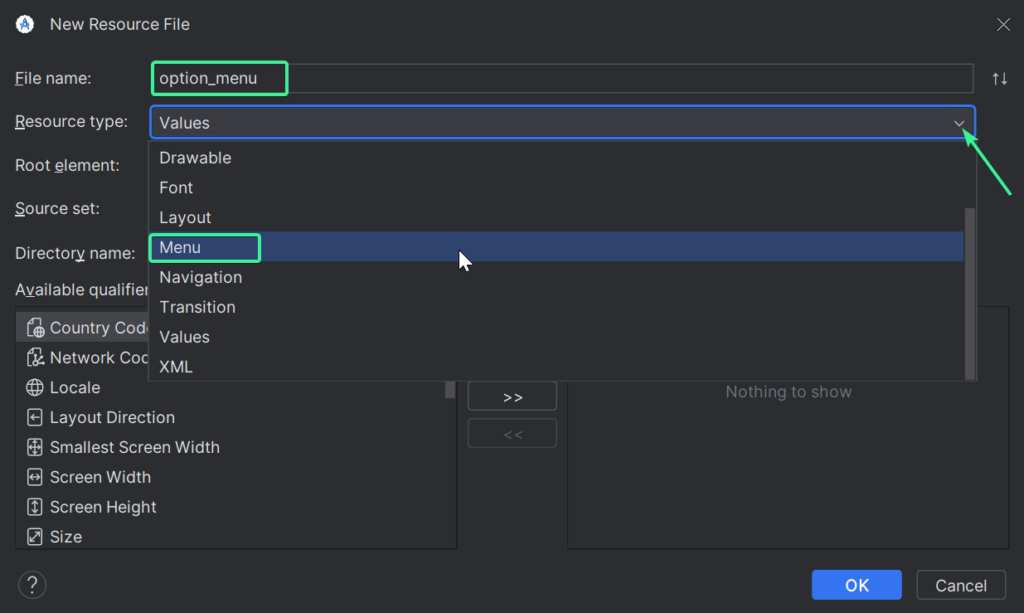
Name it “option_menu”, set the resource type to the menu, and click OK.
Step 3.2: Adding a menu item to option_menu.xml
Add an item for sharing by defining its ID, title, and optional icon.
<item
        android:id="@+id/share"
        android:title="Share"/>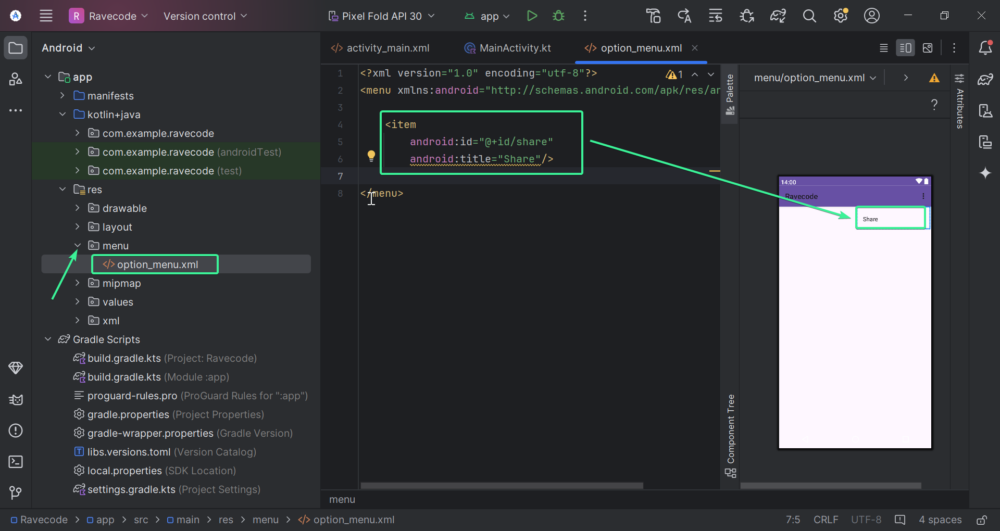
Step 4: Setting up viewBinding
Step 4.1: Adding the dependencies
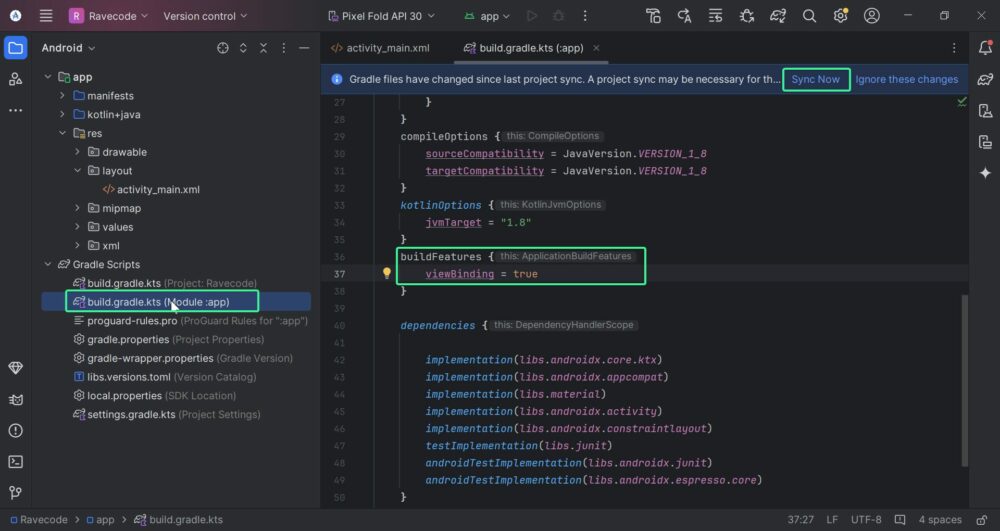
Open the “build.gradle” file (app level) by navigating to “Gradle Scripts”, and enable viewBinding by adding the following code inside the android{} block. Then click on “Sync Now” prompt to sync the project with gradle files.
buildFeatures {
        viewBinding = true
    }
Step 4.2: Implementing viewBinding in MainActivity
In your MainActivity, declare a lateinit variable for viewBinding.
lateinit var binding: ActivityMainBindingSet Up viewBinding in onCreate{} Method by initializing the binding and setting up the content view using the code below.
Remove the old code to set content view, that is setContentView(R.layout.activity_main)
binding = ActivityMainBinding.inflate(layoutInflater)
        setContentView(binding.root)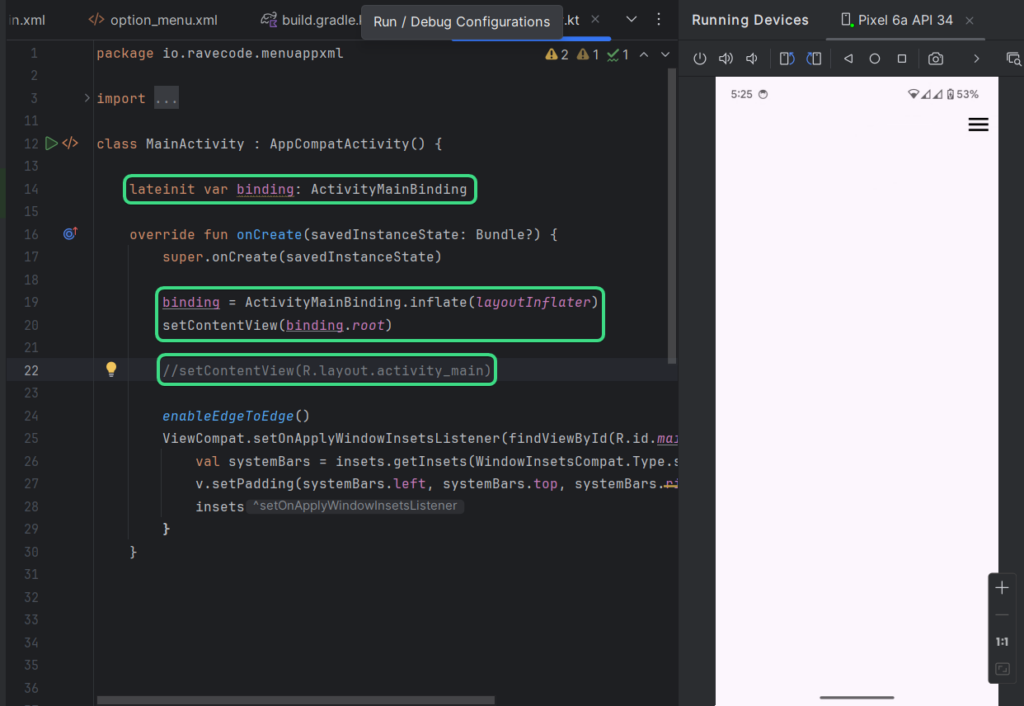
Step 5: Create showPopupMenu{} Function
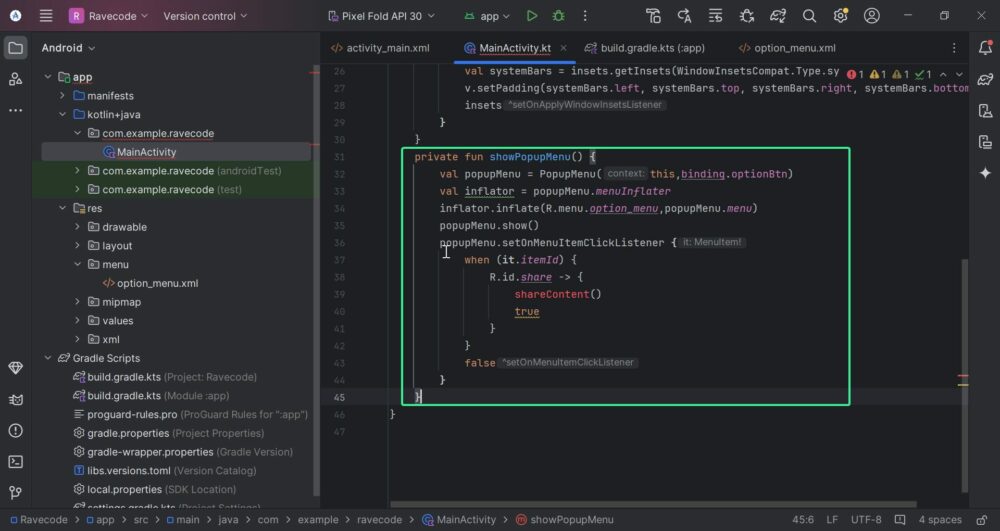
Define a function to display the popup menu and handle item clicks.
private fun showPopupMenu() {
        val popupMenu = PopupMenu(this,binding.optionBtn)
        val inflator = popupMenu.menuInflater
        inflator.inflate(R.menu.option_menu,popupMenu.menu)
        popupMenu.show()
        popupMenu.setOnMenuItemClickListener {
            when (it.itemId) {
                R.id.share -> {
                    shareContent()
                    true
                }
            }
            false
        }
    }
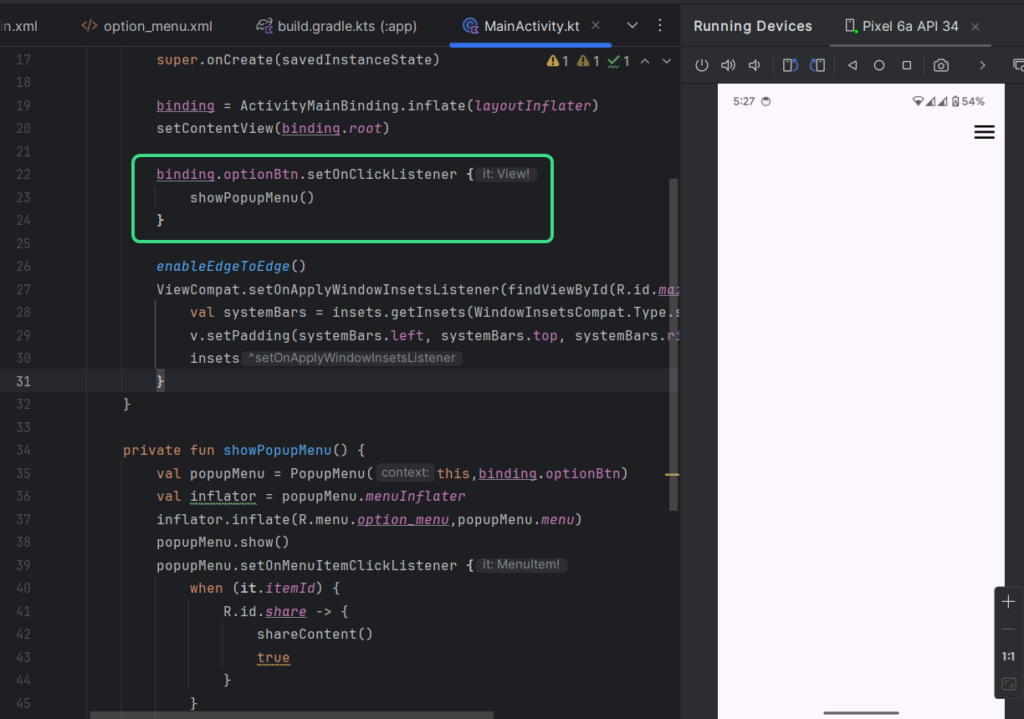
Bind the menu button and set an onClickListener{} to show the popup menu.
binding.optionBtn.setOnClickListener {
            showPopupMenu()
        }
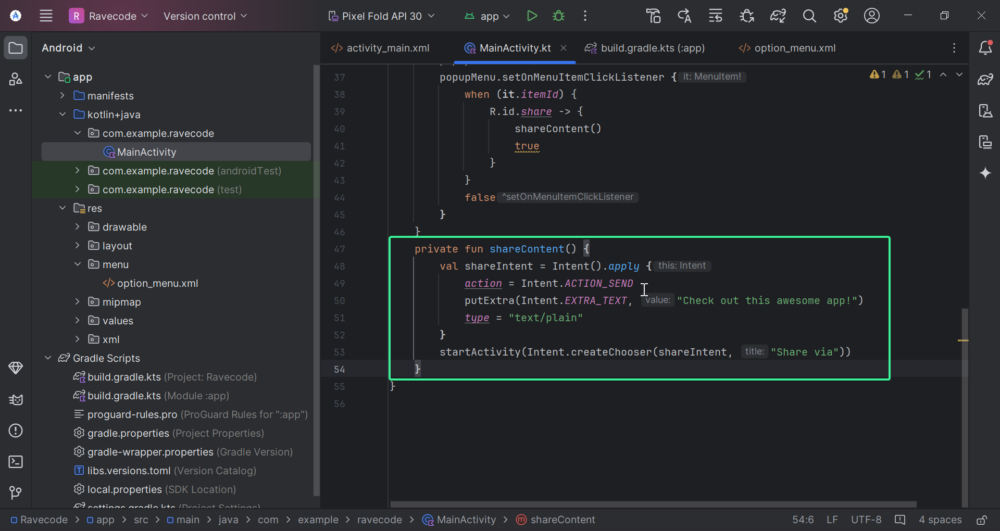
Step 6: Create shareContent{} Function
Define a function to share content via an intent.
private fun shareContent() {
        val shareIntent = Intent().apply {
            action = Intent.ACTION_SEND
            putExtra(Intent.EXTRA_TEXT, "Check out this awesome app!")
            type = "text/plain"
        }
        startActivity(Intent.createChooser(shareIntent, "Share via"))
    }
Step 7: Running the Application
After implementing all the above steps, run your application. You should see the menu button in your toolbar. When clicked, it will display a popup menu with the share option. Clicking on the share option will trigger the sharing intent.

Adding More Options
To add more options to the menu, simply add items in option_menu.xml and handle their clicks in the showPopupMenu{} function.
This comprehensive guide covers all the necessary steps to create a functional menu button in Android Studio, complete with drawable icons, an options menu, and click handling using view binding.
Happy coding!
Learn more about menus in Android: Add menus | Android Developers
Leave a Reply