If you want to add any Firebase functionality in your android app. First, you will have to connect your Android App with Firebase.
Check out the video version of this blog:
In this blog I will show you how to easily connect Firebase with Android App in Android Studio and also test it using Firestore.
Firebase is a service by Google. There are over 18 Services offered by Firebase, from Authentication to Storage and Hosting and a lot more. Here is the list of all the services and their pricing.
Firebase is not something specific for Android Apps. We can connect our Website, IOS Apps, Flutter Apps or Unity Games with Firebase
That’s why… If a user creates a account in their Android App using Firebase Auth. They will be able to sign in using their IOS app as well, If the IOS app is connected to same Firebase project.
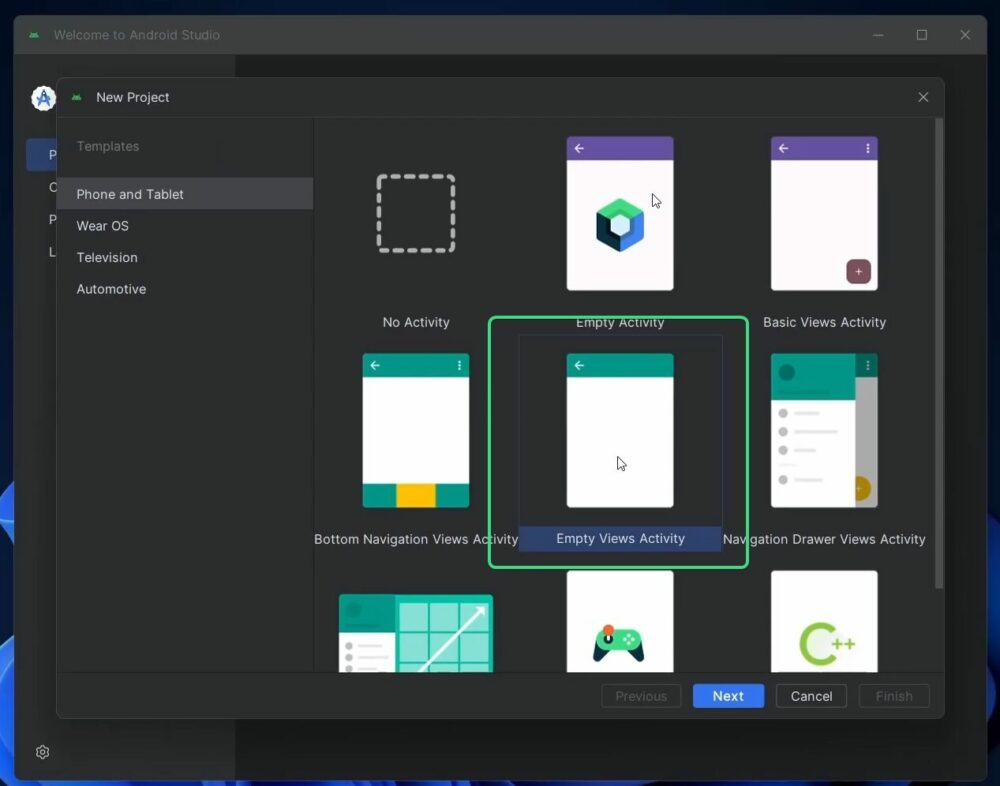
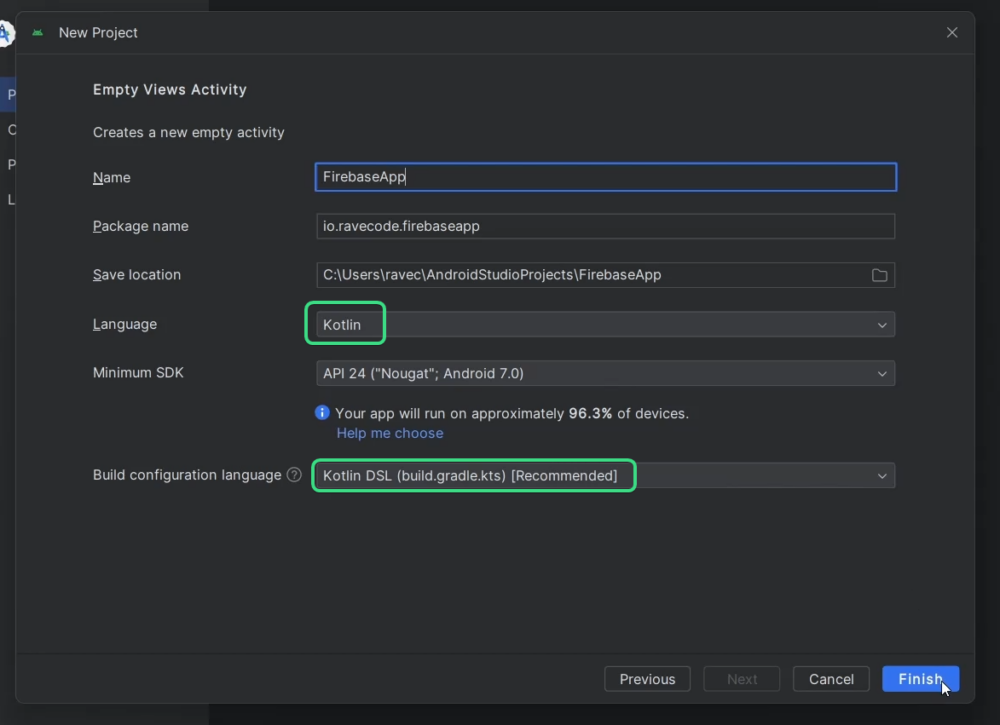
Step 1: Create your Project
We will be using XML, Kotlin and Kotlin DSL in case of Gradle
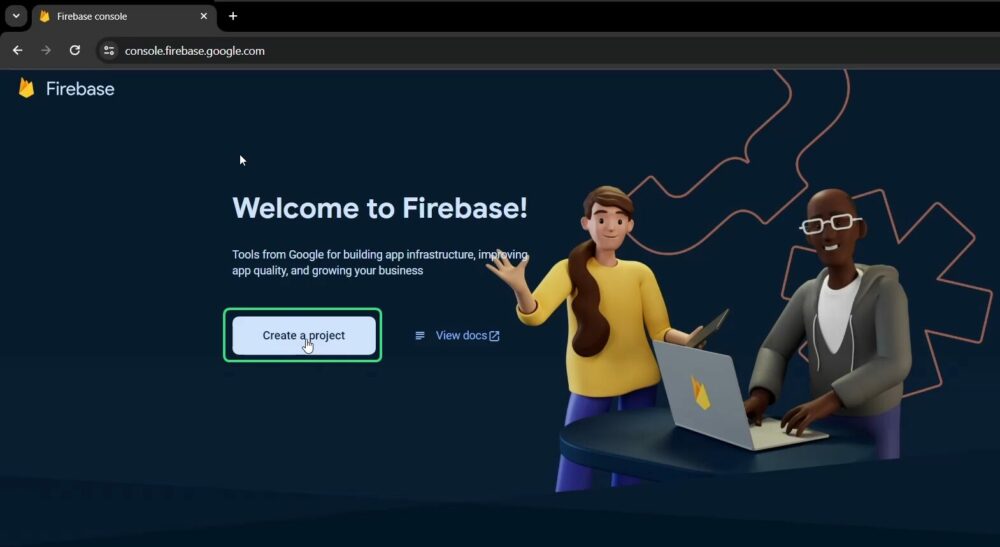
Step 2: Create a Firebase project
Go to Firebase Console. Login with your google account and create a new project.
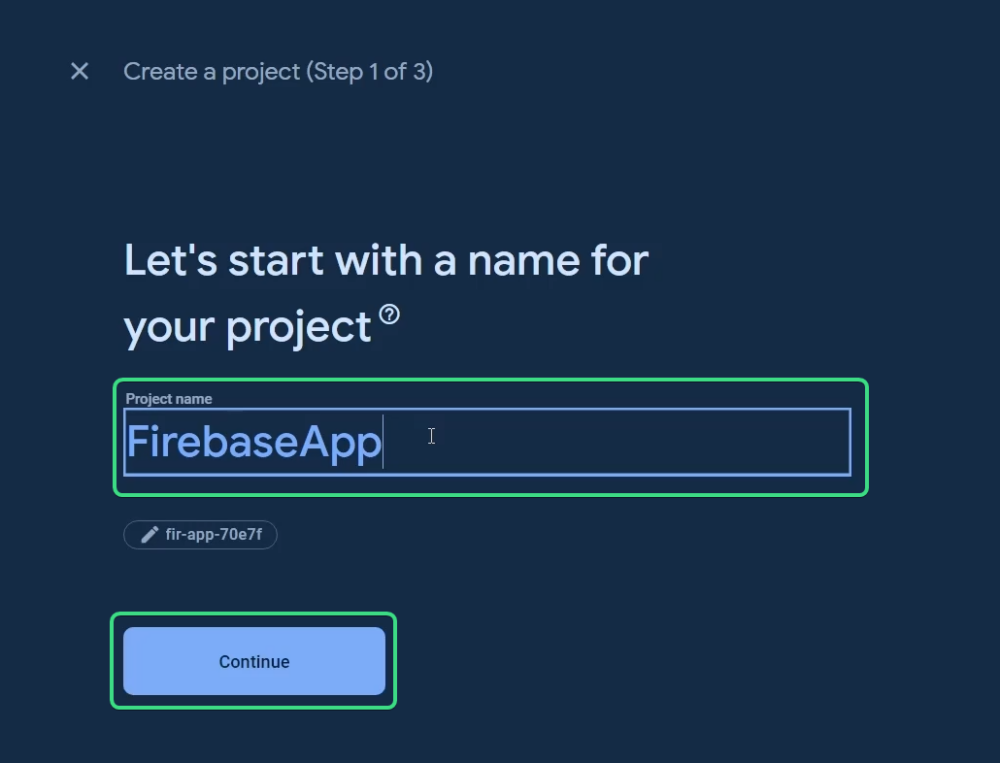
Give your project a name. You can use the app’s name as the projects name. And them continue.
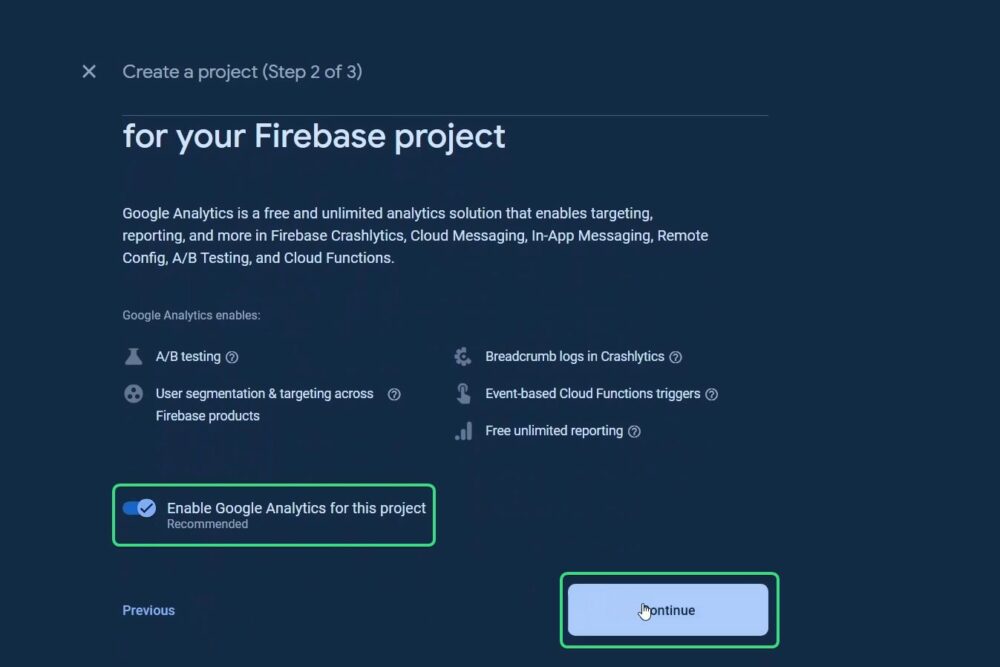
Then it will ask if you want to enable Google Analytics. Google Analytics is used to track how your users are using your app or website. Like how long they are using your app(or website if you have connected that to the same firebase project) and in which page they are spending most of their time.
You can keep it enabled.
Next select the Analytics account. There will be a default account or you can create a new Analytics account for that project if you want. And then click create project.
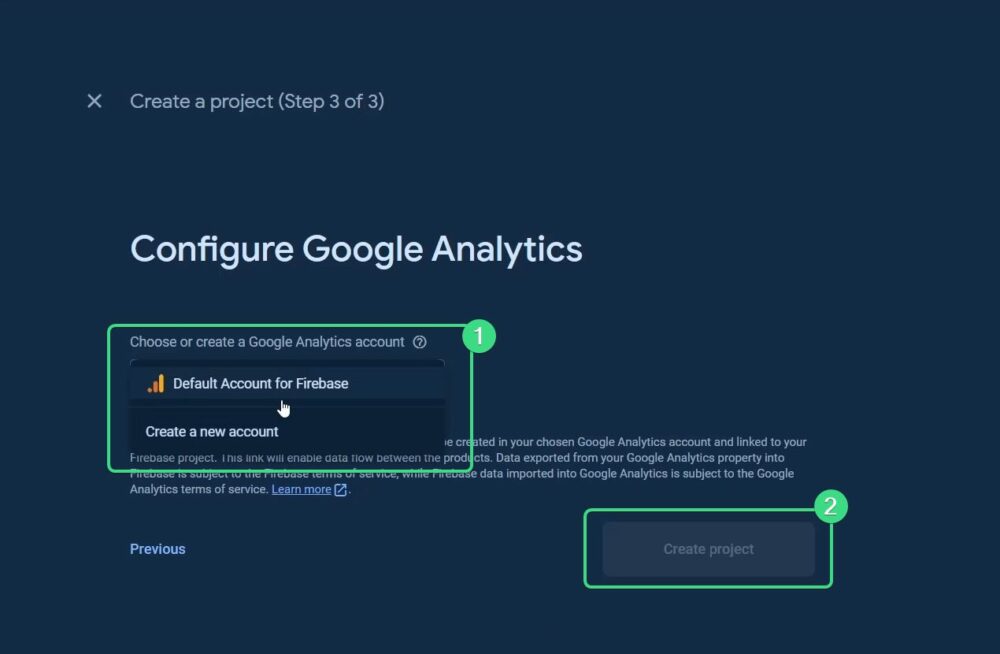
Your project will then be created. Click continue to go the console home page.
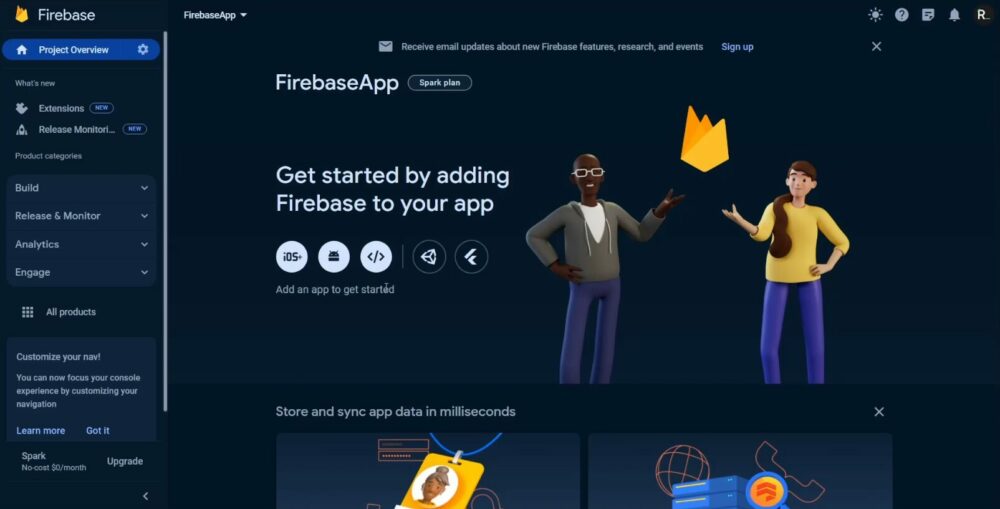
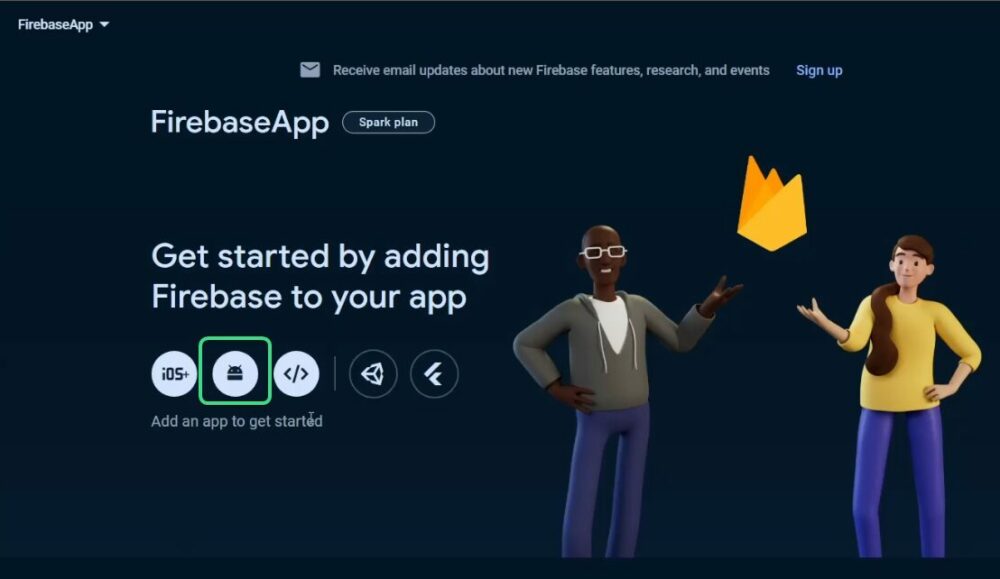
Step 3: Select Android App
Select android app option like in the below screenshot.
Step 4: Register app
In the First field, add your package name. You can find the package name in your MainActivity file, and in the second field, add your app’s name. You can put whatever name you want or skip the second field too.
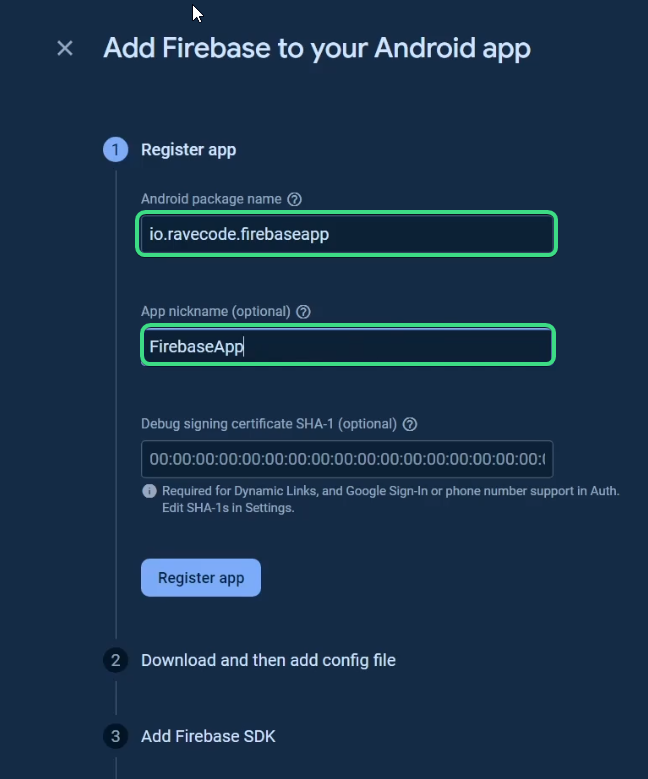

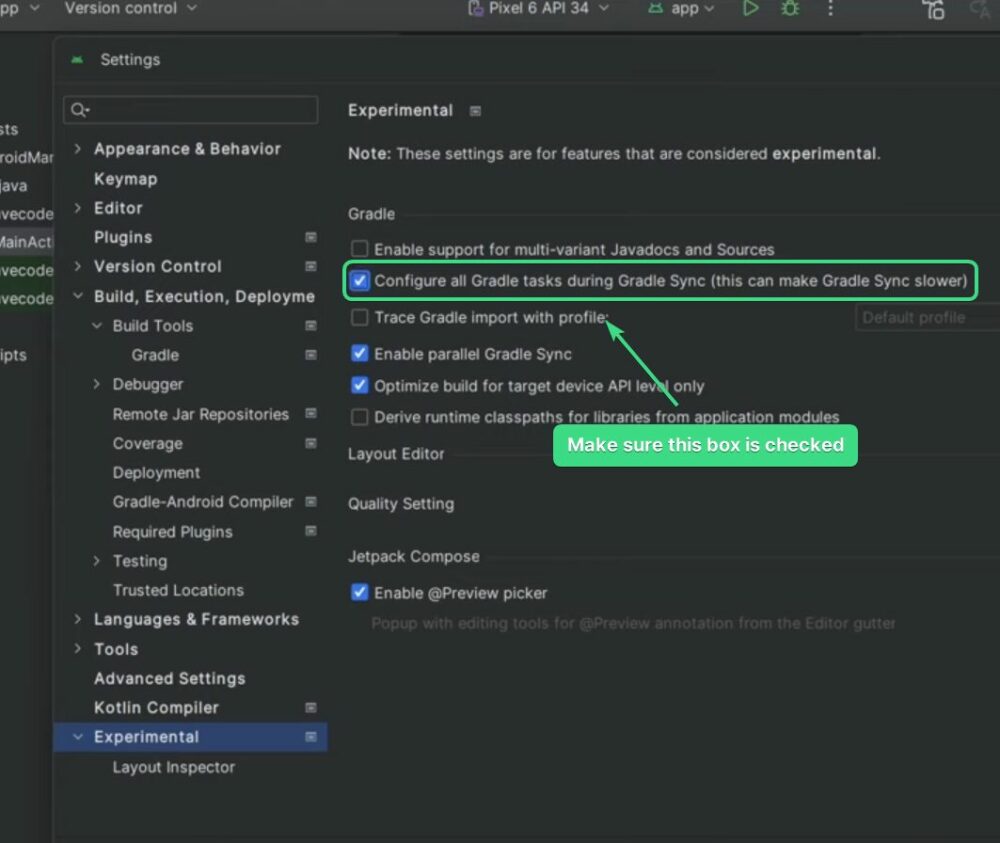
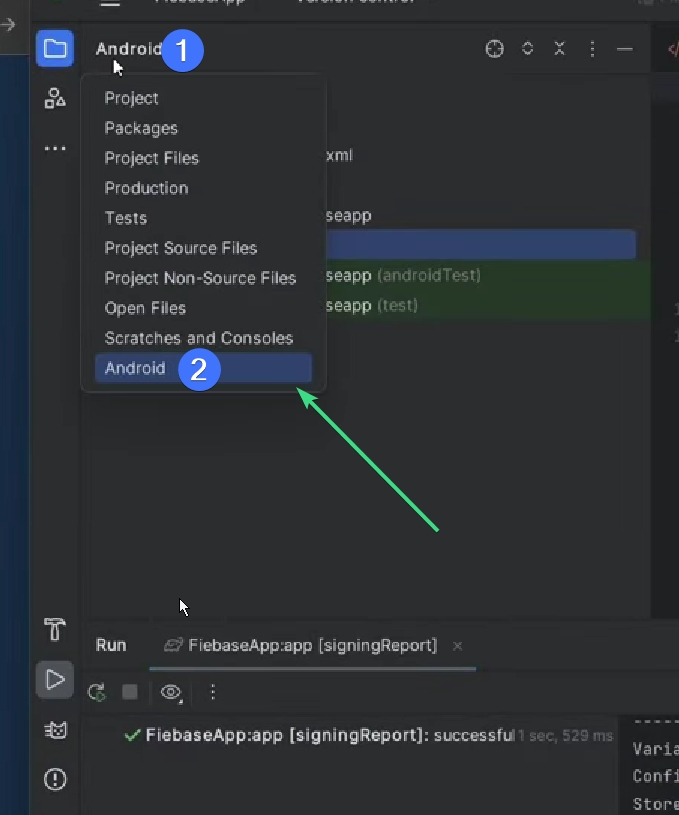
In the third field, you need to add the SHA-1 keys. This is a unique key for your app. Its optional but if you plan to use FIrebase auth, you will have to add this to firebase. Let’s find that in Android Studio.
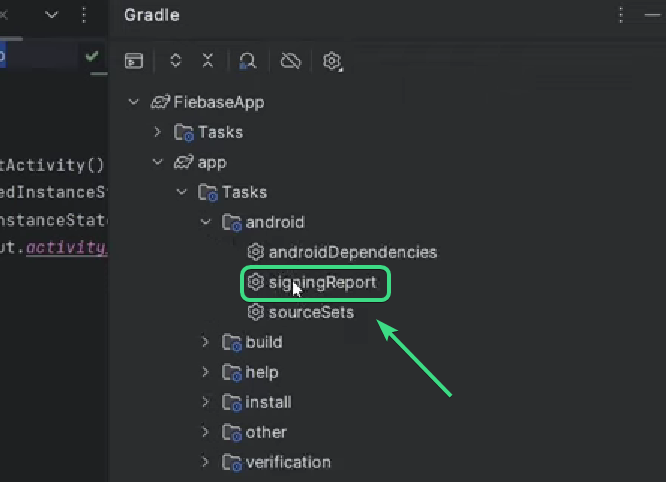
On the sidebar, click on the Gradle logo

Next open <App Name> -> App -> Tasks -> android. Here open signingReport.
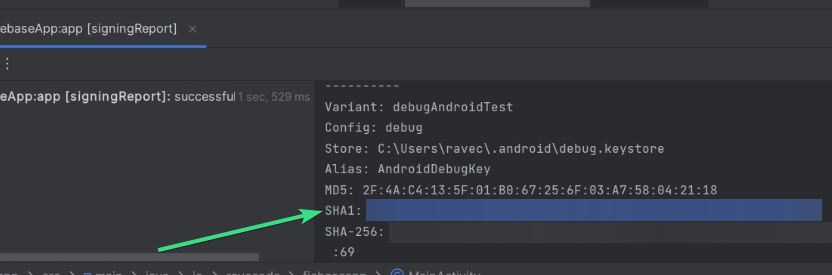
This will open up a panel from the bottom and show you your SHA1 Key. Copy the key and paste it in Firebase.
If you don’t see signingReport, make this box in the screenshot is checked from the settings.
Step 5: Add the JSON file
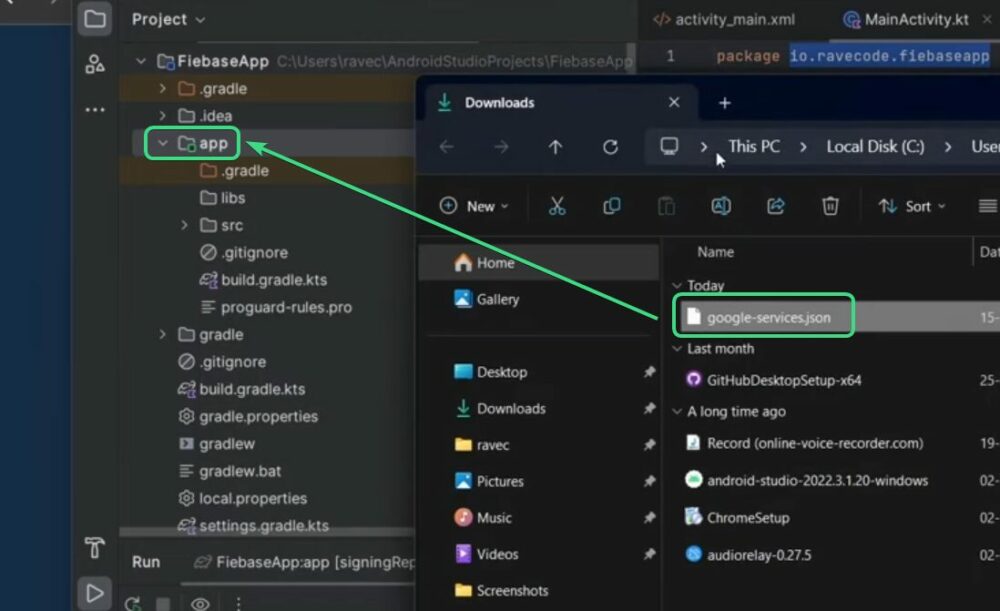
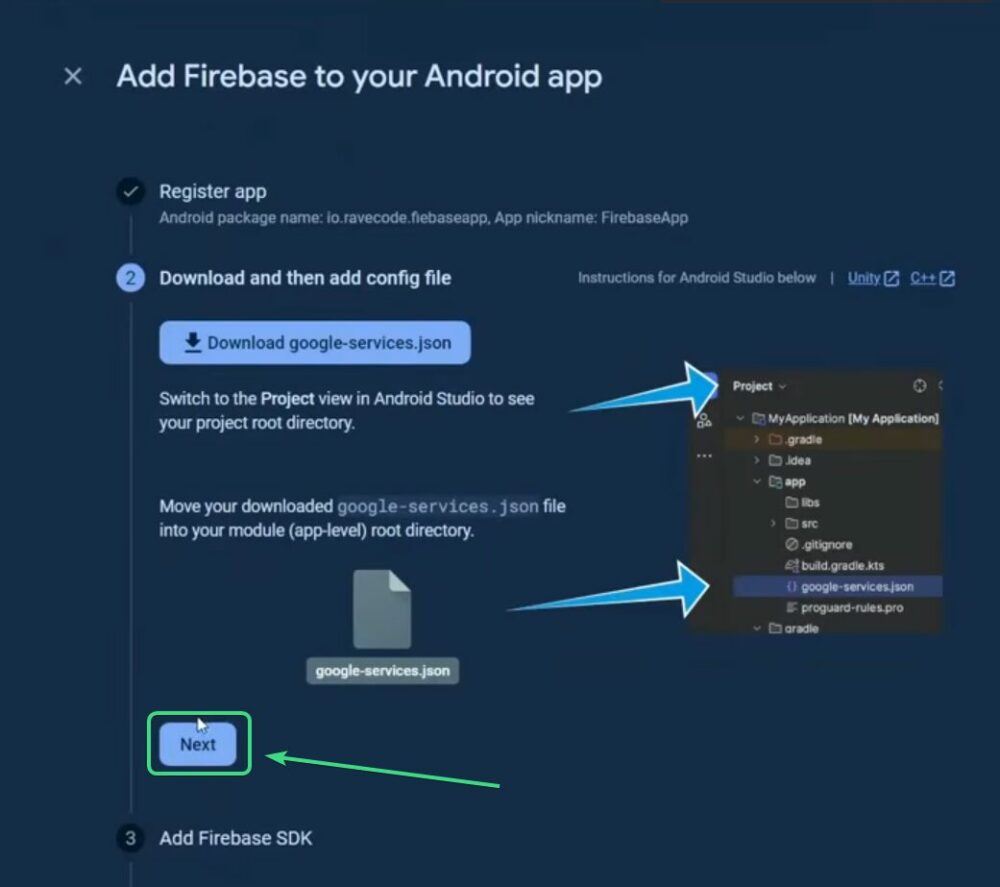
Next download the google_services.json file and add it to the “app” folder.

To move it to the app folder, open Android Studio and switch to project view.
Next, open the app folder and drag the JSON file there.
Next in Firebase, move to the next step by clicking on the “Next” button.
Step 6: Add the dependencies
Next we need to add dependencies of Firebase. So in the next step, select Kotlin DSL or Groovy, whichever you are using.
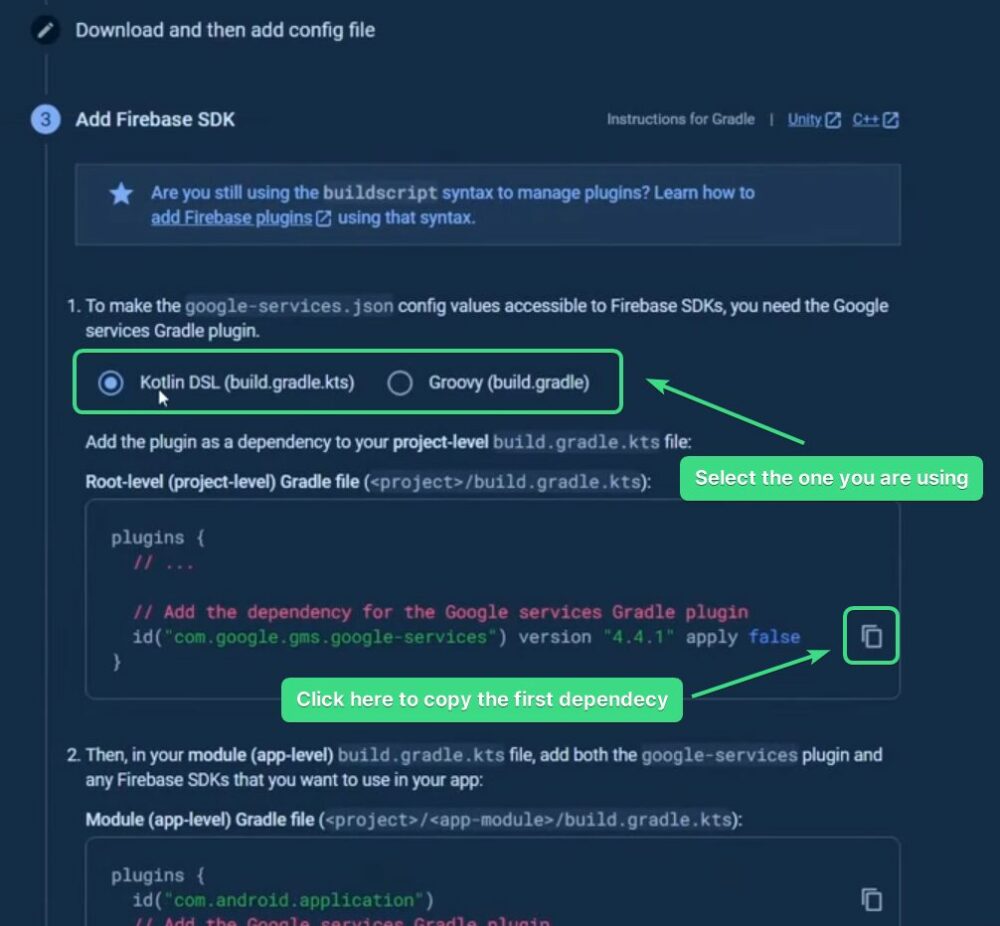
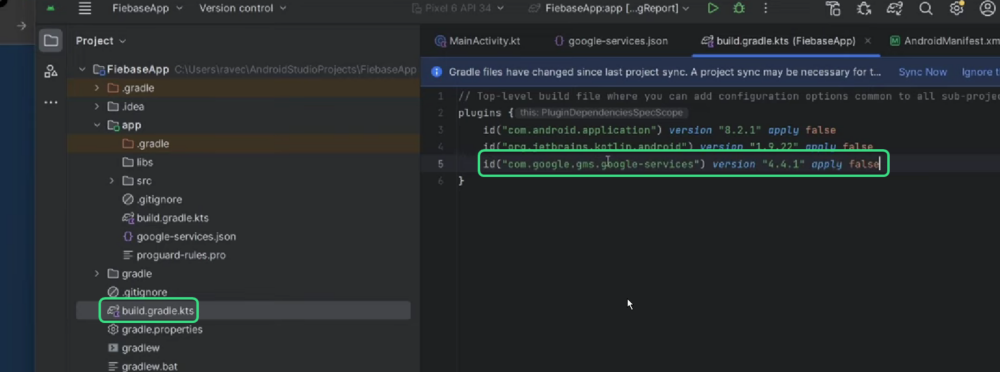
Next copy the first line for project the project level gradle file. Next open Android studio and from the sidebar, open the file “build.gradle.kts” with “project: AppName” where AppName is the name of your app. Add the copied code inside the plugins block.
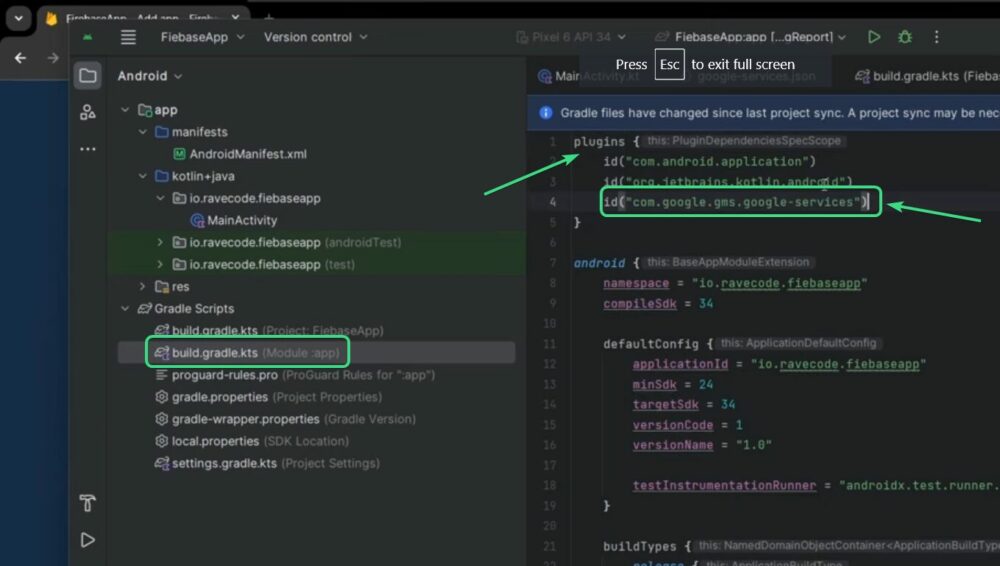
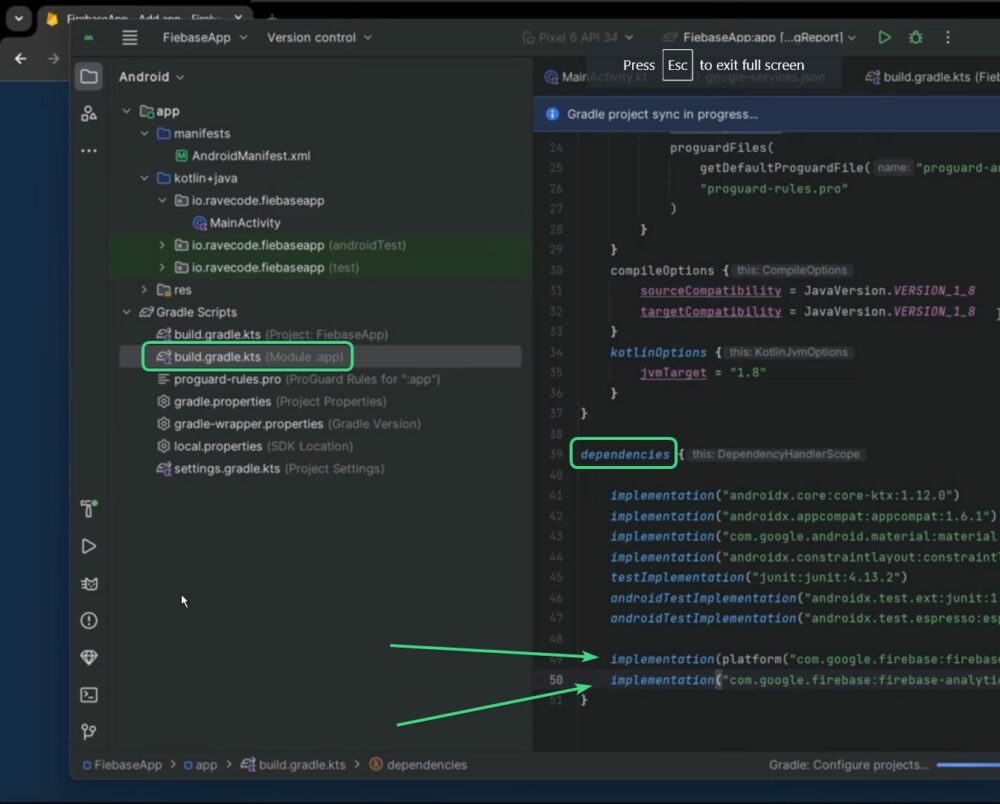
Next copy the other dependencies for the next file and in android studio, open “build.gradle.kt” with “Module :App” as you can see in the below screenshot.
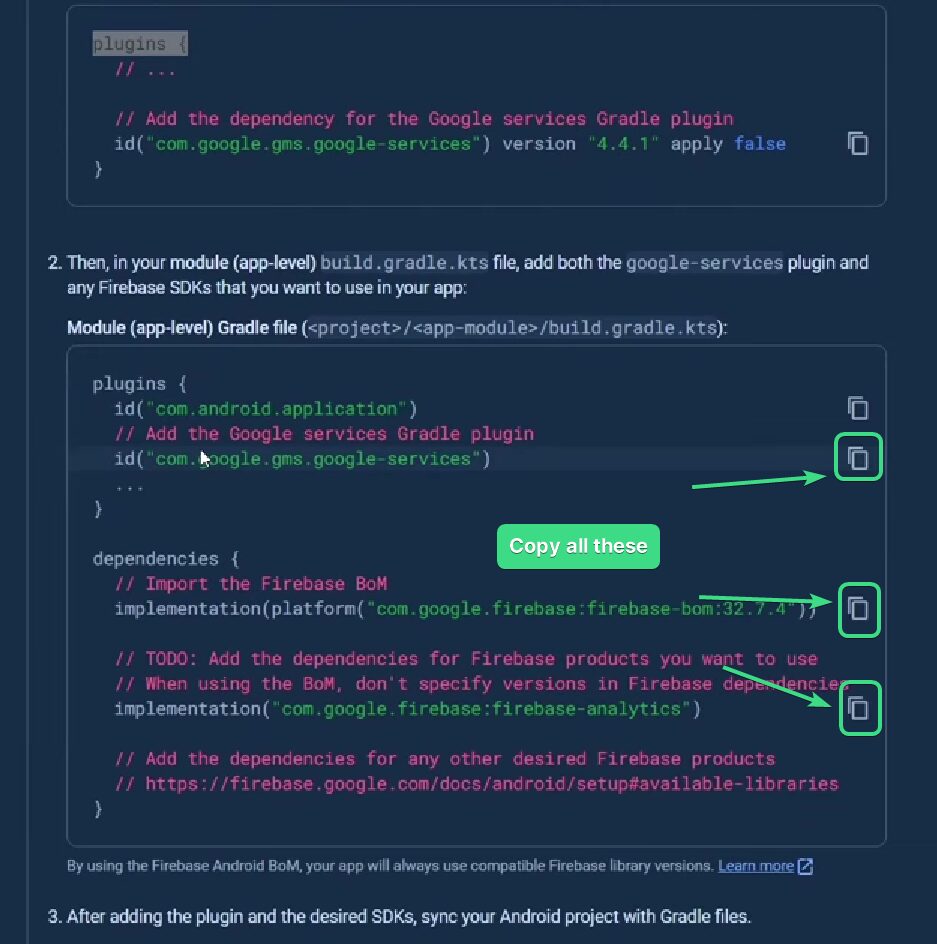
Next paste first line of code in the plugins{} block and the next the lines of code in dependencies{} block.
Now click on Next and you get back to Firebase console. This all you need to do to connect your Android App to Firebase.
Leave a Reply