Signing in with Google is probably the most popular way users authenticate themselves these days. Its the easiest and the quickest. Let’s see how to add this to a Android App using Kotlin and XML.
Source code:
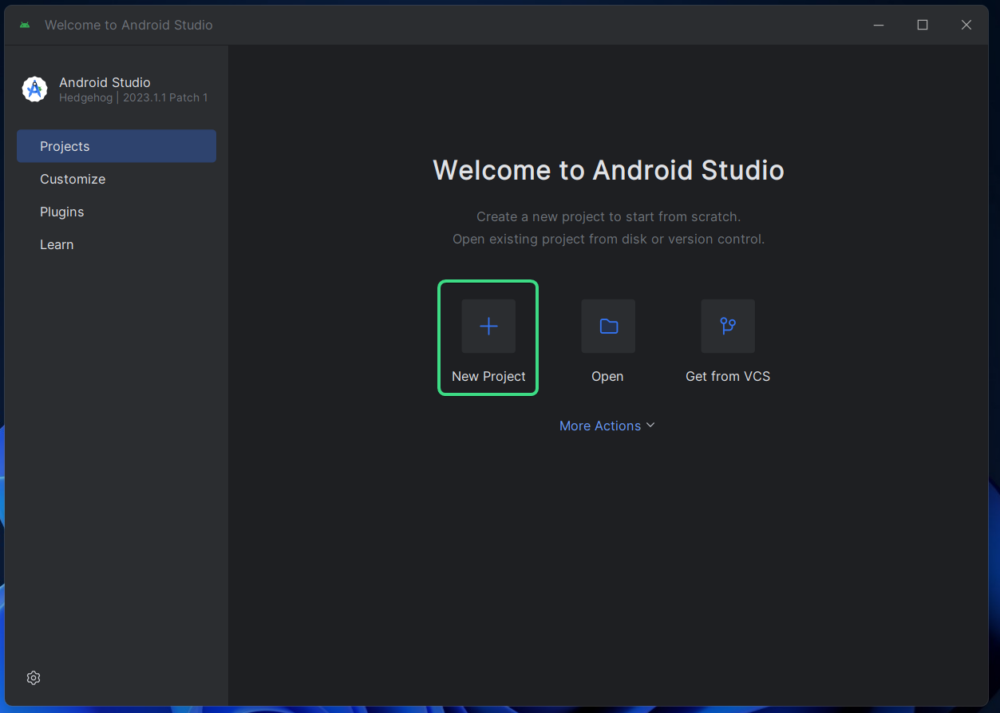
1. Create the App
Click on “New Project” to create the app
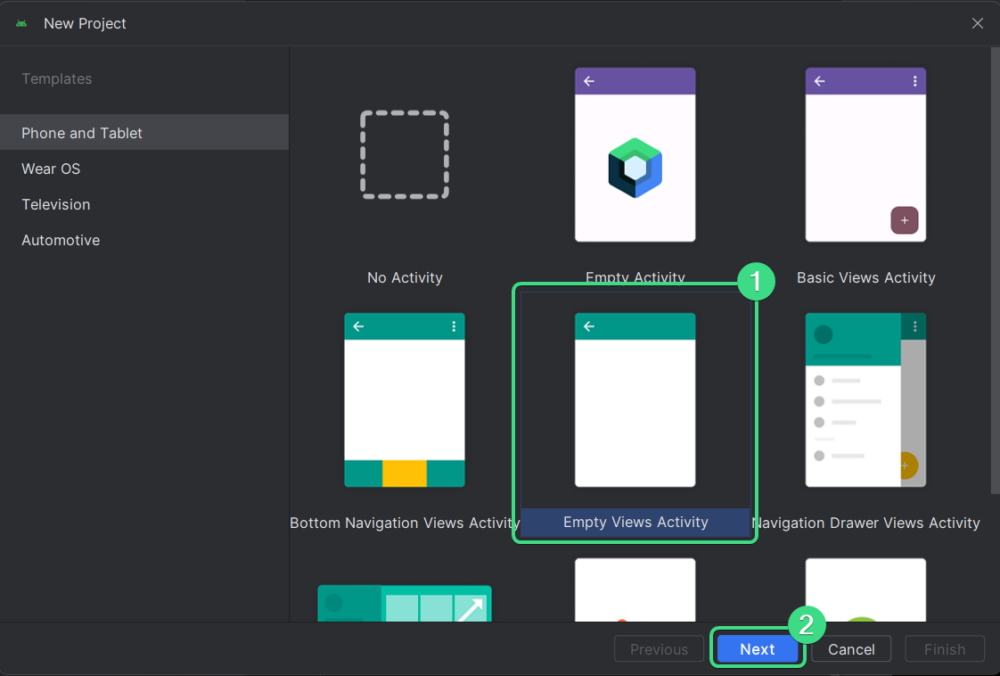
Select “Empty Views Activity” and click “Next”.
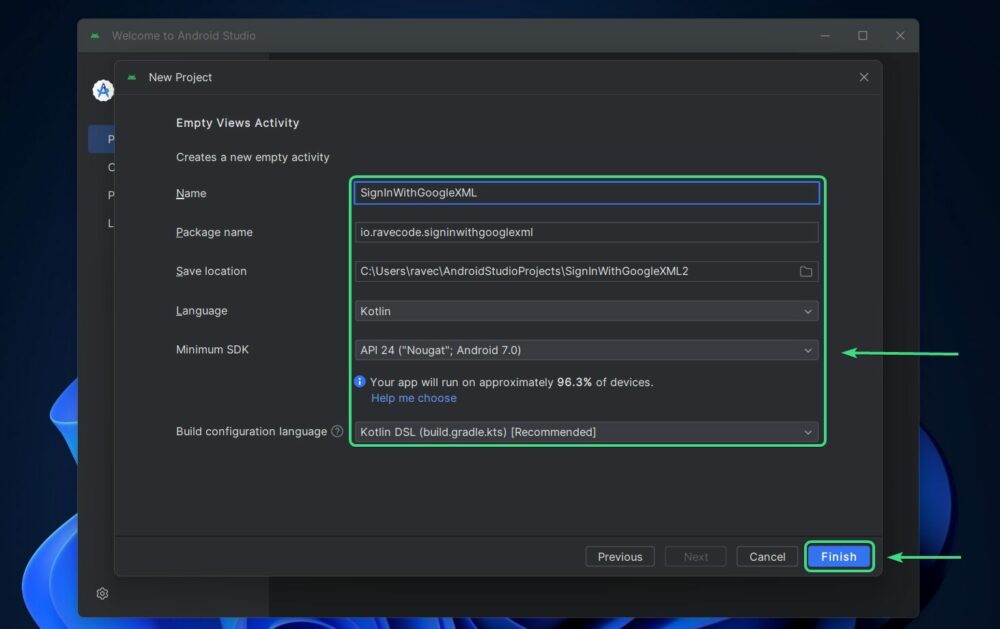
Fill the app details like app’s name, the language you want to use and other details.
2. Enable viewBinding
Next let’s quickly enable viewBinding. This will help us easily access the views from the XML in our Kotlin file.
    buildFeatures {
        viewBinding = true
    }

3. Connect App to Firebase
Next you need to connect your App to Firebase. I have written a detailed blog on how to create a Firebase project and connect it to your android app.
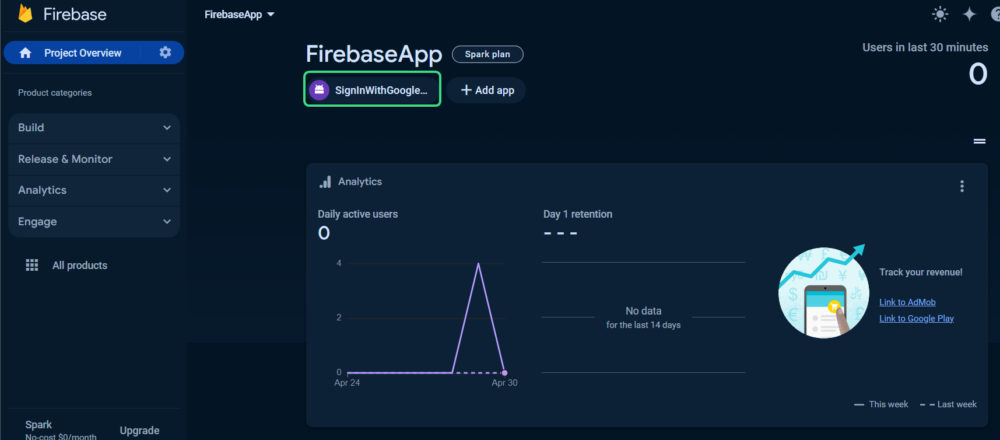
Once you have connected your android app, you can will see your app in your Firebase dashboard.
4. Enable Google sign in provider
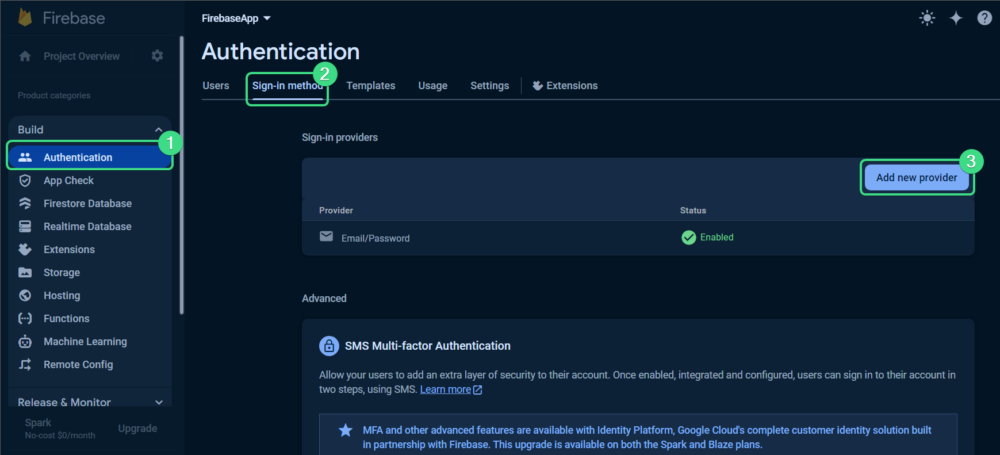
Now we need to enable Google as Sign in method. So in Firebase console, click on the “Build” tab and open Authentication section. Next, open the “sign in method” tab and click on “Add new provider”. This will open up a section where you can choose the provider you want to enable.
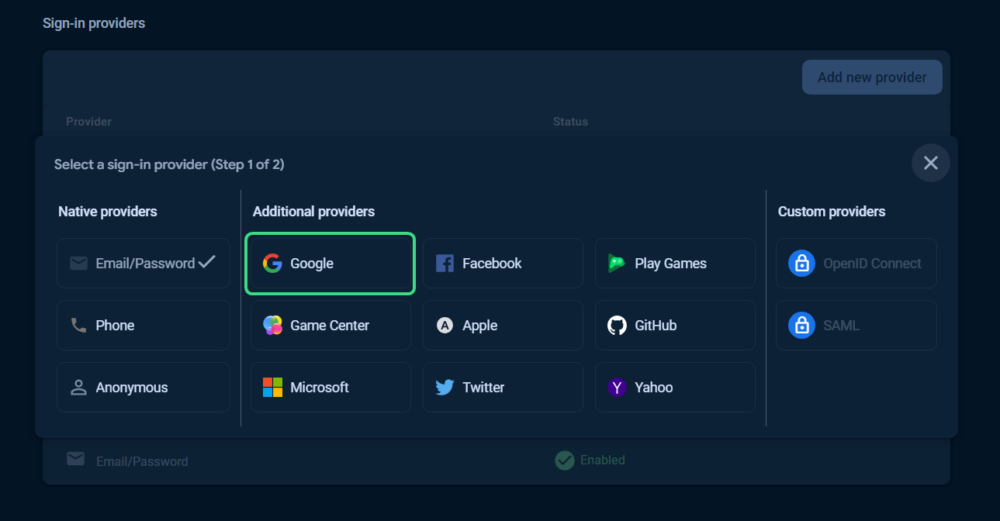
Here click on “Google” from “Additional providers” section.
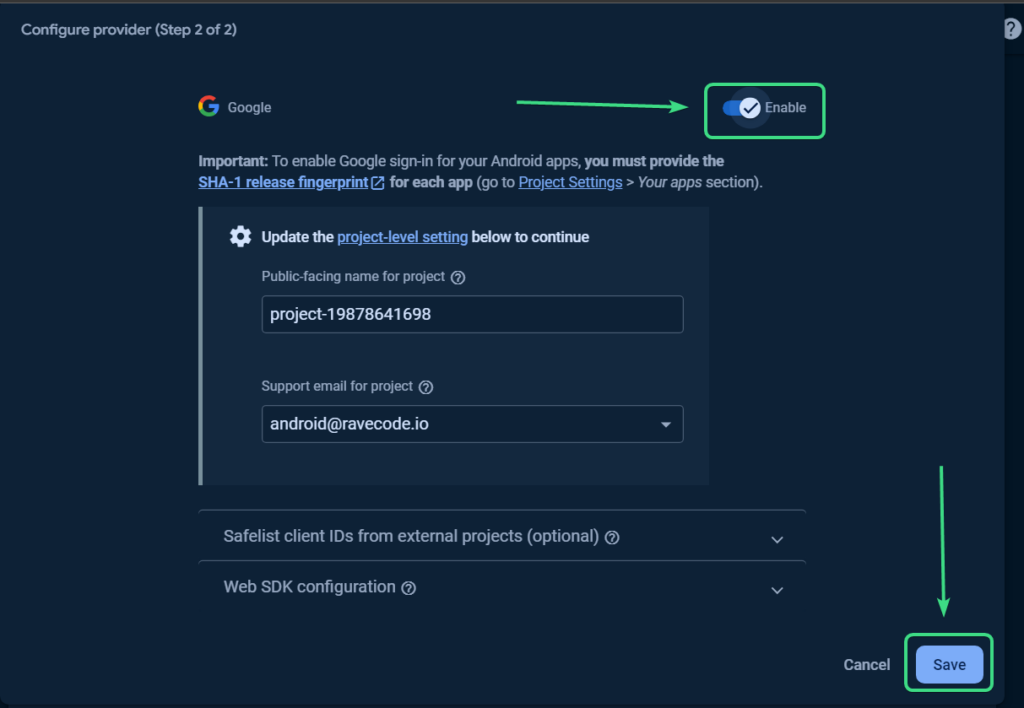
Next toggle on the Google provider, provide a support email and then hit the “Save” button.
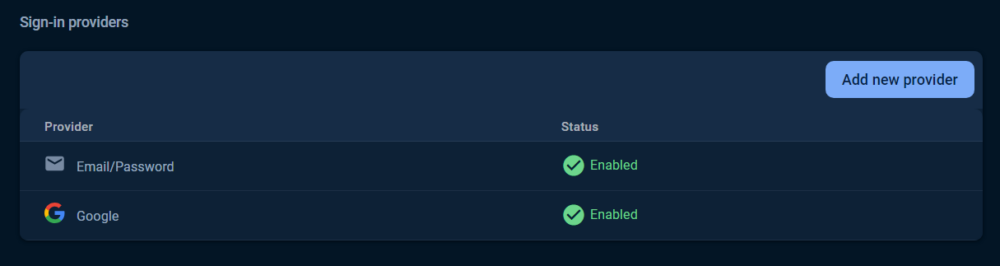
Now you can see Google is enabled in the sign-in providers section.
5. Add the dependencies
Now we need to add the necessary dependencies from Firebase and Google. You might have already added some of the dependencies while connecting your app to Firebase in step 3. Here are the dependencies you need to add:
id("com.google.gms.google-services") version "4.4.1" apply false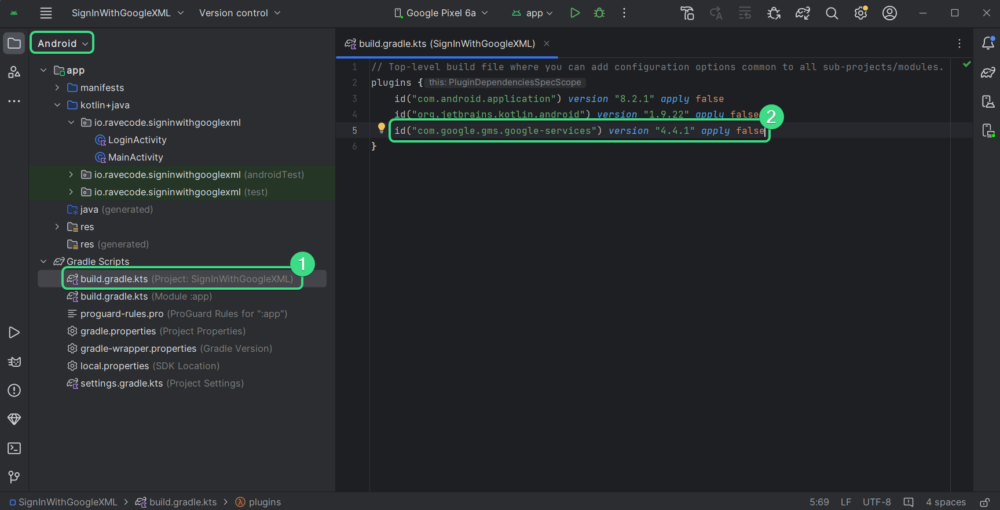
    implementation("com.google.firebase:firebase-analytics")
    implementation(platform("com.google.firebase:firebase-bom:33.0.0"))
    implementation("com.google.android.gms:play-services-auth:21.1.1")
    implementation("com.google.firebase:firebase-auth-ktx:23.0.0")
    implementation ("androidx.credentials:credentials:1.2.2")
    implementation ("androidx.credentials:credentials-play-services-auth:1.2.2")
    implementation ("com.google.android.libraries.identity.googleid:googleid")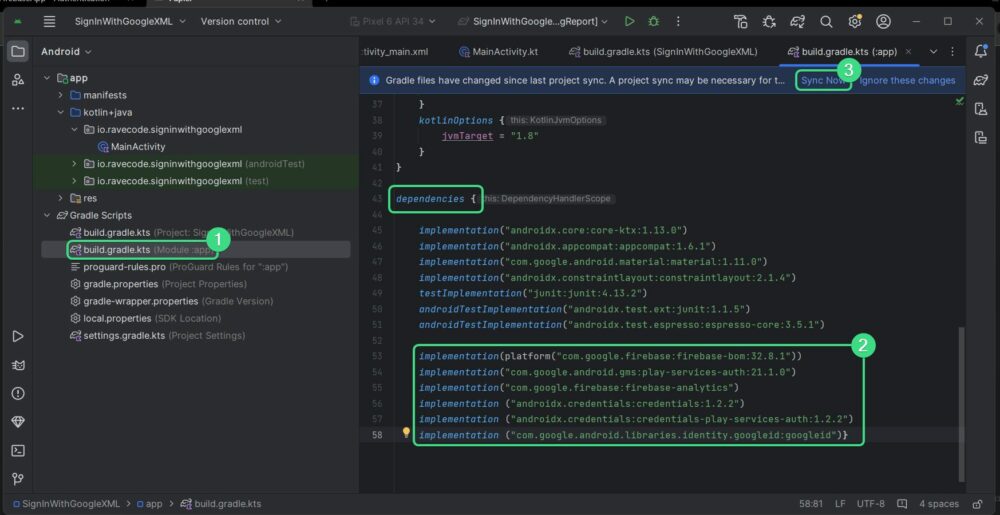
6. Create LoginActivity and add “sign in with Google” button
Now we will add LoginActivity beside MainActivity. This is where we will add the Login UI and Authenticate our user. You might also add other methods of Authentication like Email-password Authentication in this activity.
We will set this activity Launcher Activity in the Manifest file. When user will open the app, this activity will open and check if the user Authenticated or not. If already authenticated, we will move to the MainActivity or else we will so the LoginActivity UI. We add the code for this functionality in the 7th step.
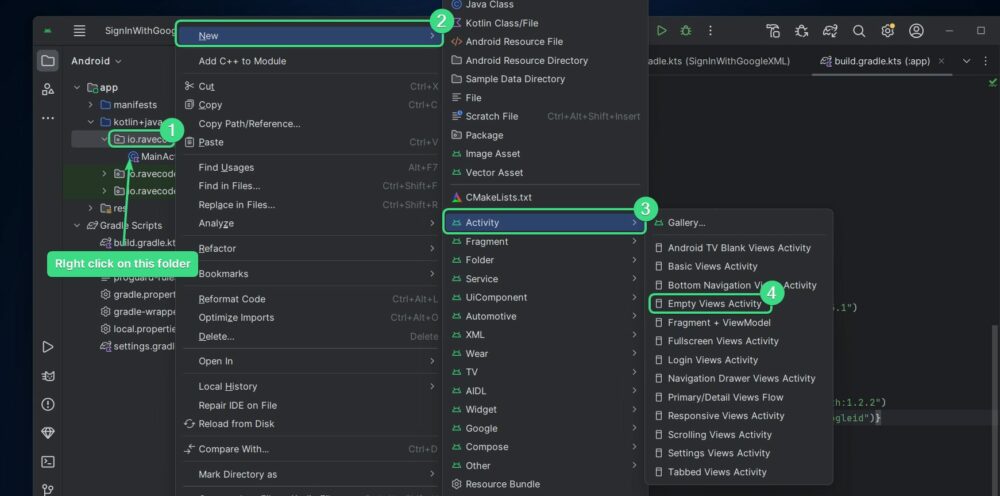
Now let’s create the Activity. Right click on the folder with your package name and from the Menu, go to New -> Activity -> Empty Views Activity.
Add your activity Name and set it as Launcher Activity, then click finish.

Now let’s add the Sign-in with Google Button in the activity_main.xml.
If you haven’t add the dependencies, you will see a error while adding the above code.
<com.google.android.gms.common.SignInButton
        android:id="@+id/sign_in"
        android:layout_width="wrap_content"
        android:layout_height="wrap_content"/>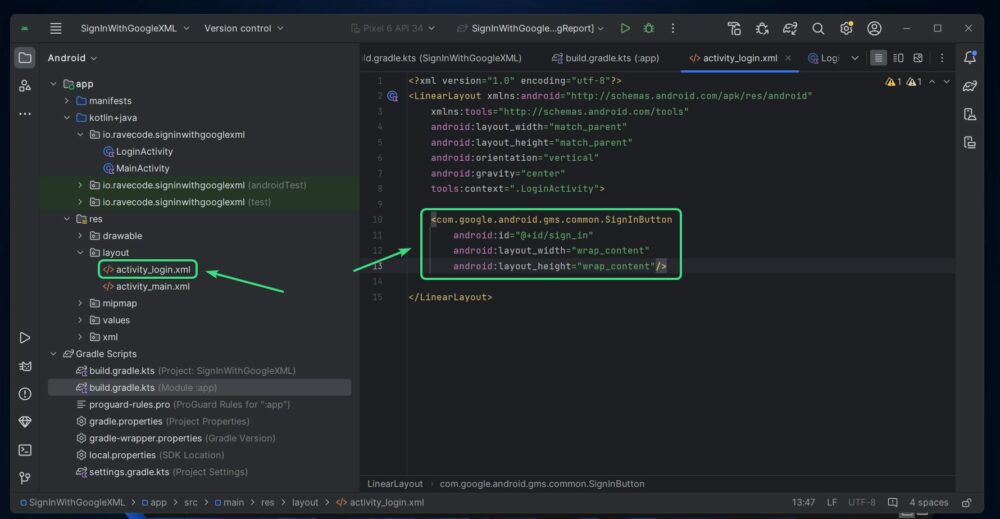
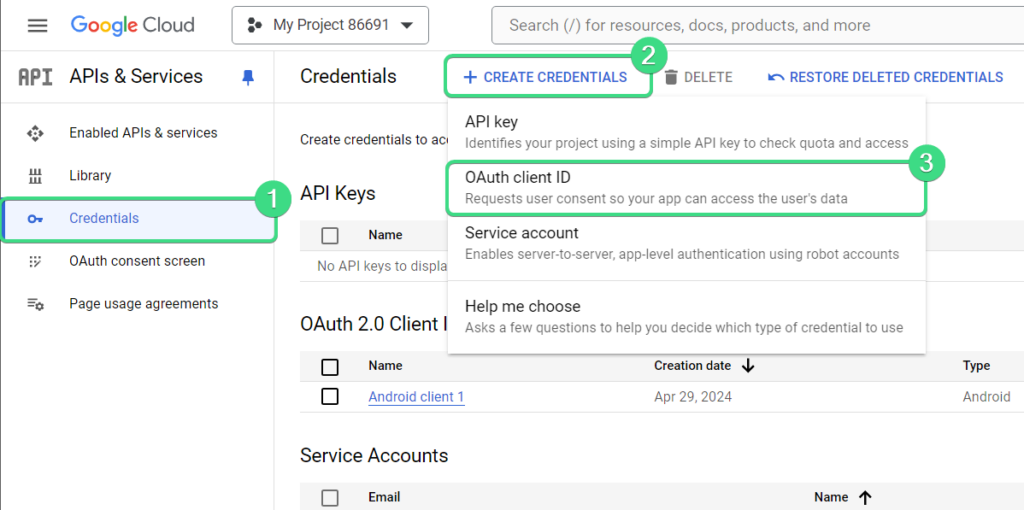
7. Generate Web Client ID
Now we need a OAuth Client ID which tells Google, whose app is trying to use “Sign-in With Google”. To create one, open Google Cloud, and create a project. Next, in the credentials page, click on “create credentials” and select “OAuth client ID”.
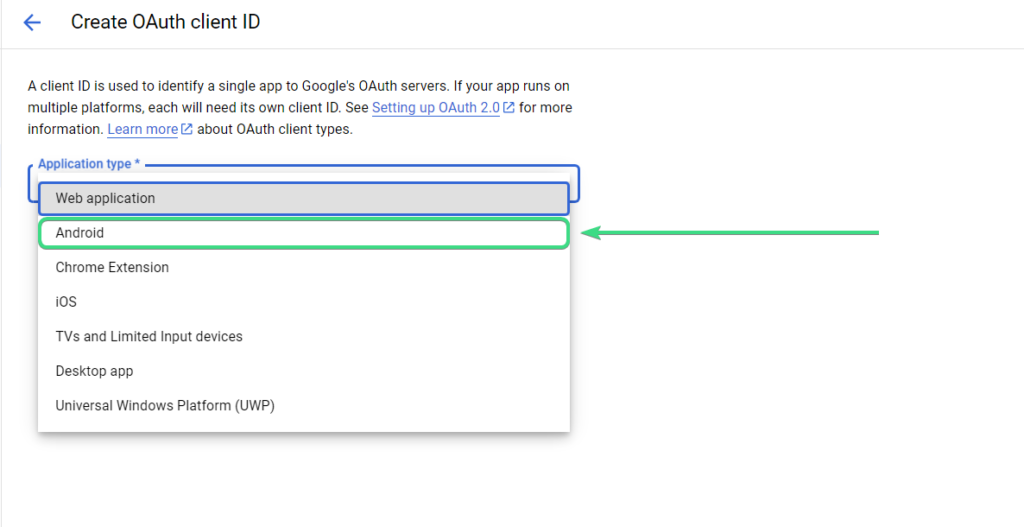
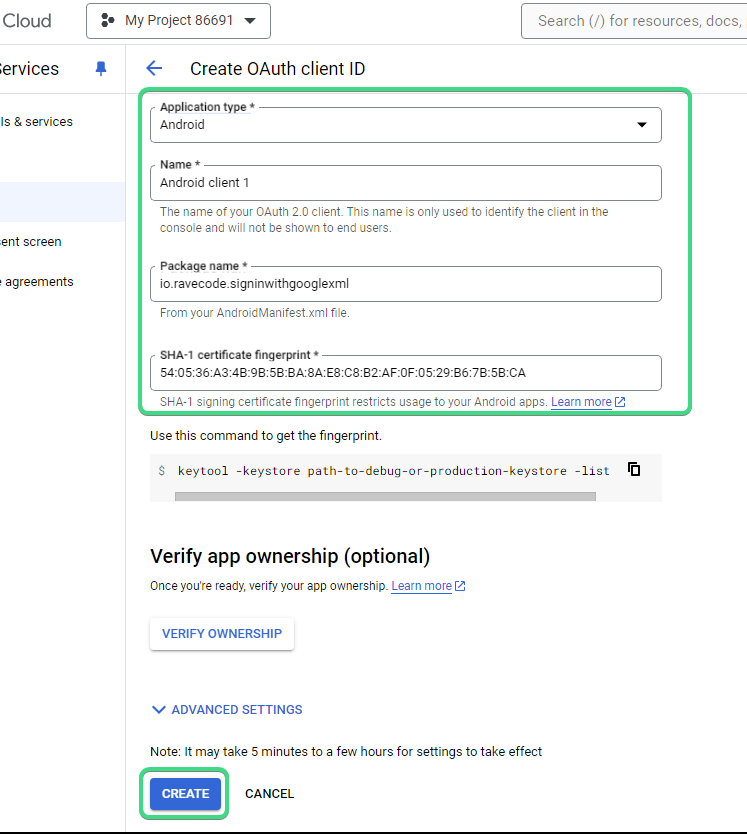
In the Next page, select Android as the Application type.
Now copy your package name from the top of your MainActivity and SHA-1 Key by going into Gradle -> [AppName] -> Tasks -> android -> open signingReport. This will open up your build tab and you will your SHA-1 key at the bottom.
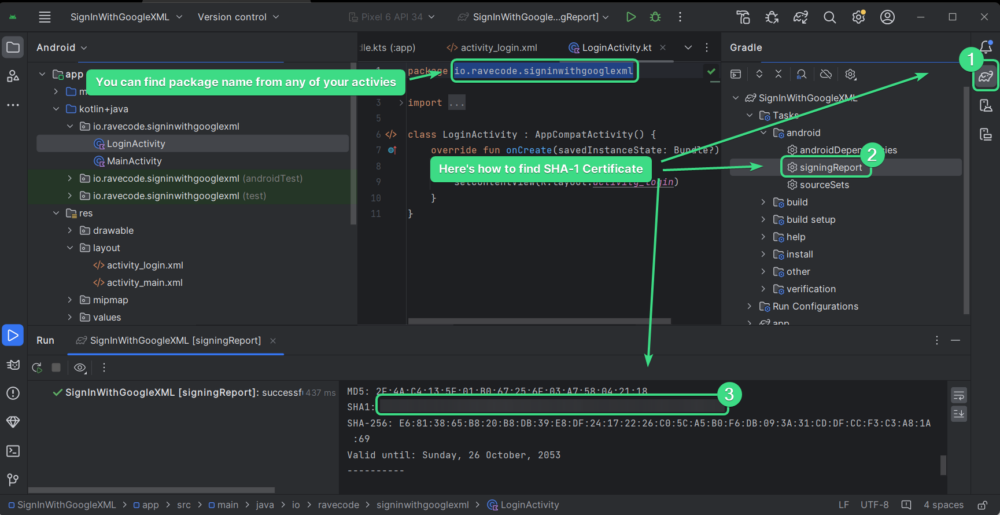
Now paste the package name and SHA-1 key in Google cloud and hit create.
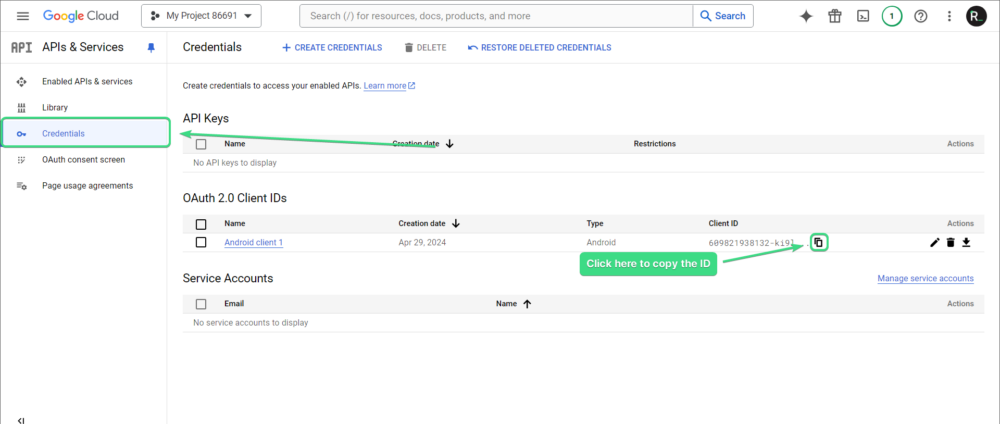
Now you can see your OAuth client ID in the Credential page. Just click on the copy button to copy the Key.
Next in Android studio, open the “strings.xml” file from the “values” inside the “res” folder. There add the client id with the name “default_web_client_id”.
<string name="default_web_client_id">YOUR_CLIENT_ID</string>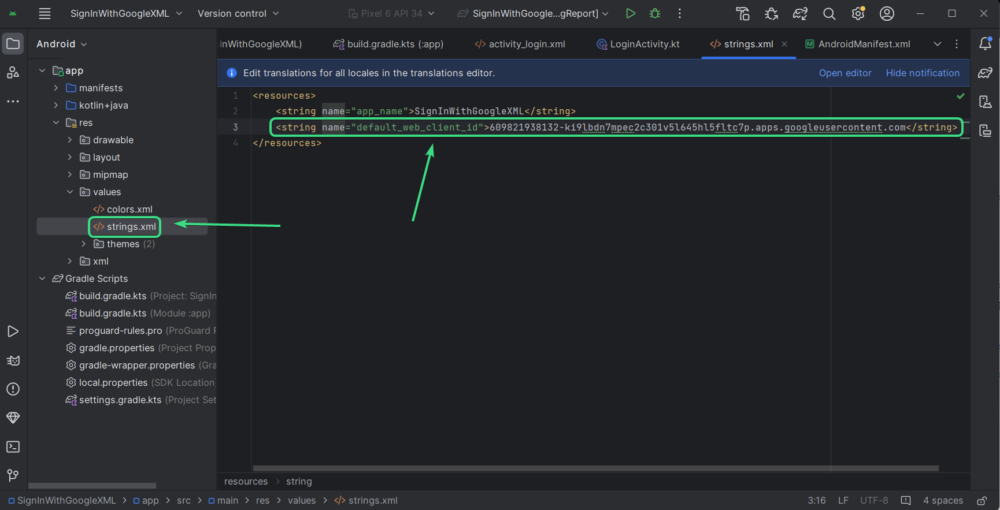
8. Login Activity
Now we will setup the LoginActivity.
8.1 Setup Binding
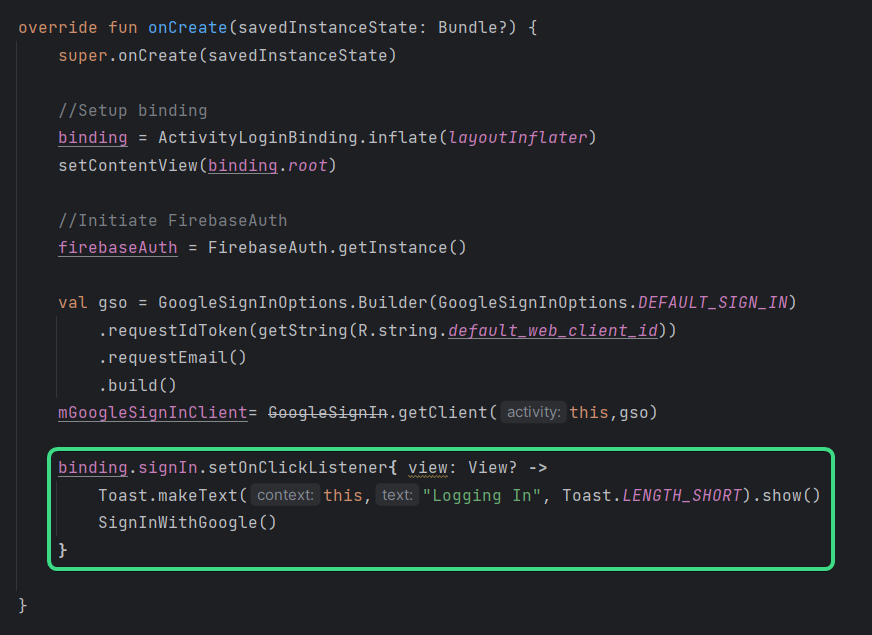
Let’s setup Binding. Just create a lateinit var and inflate it with layoutInflator in the onCreate function. Then set binding.root as the content for LoginActivity.
private lateinit var binding: ActivityLoginBindingbinding = ActivityLoginBinding.inflate(layoutInflater)
setContentView(binding.root)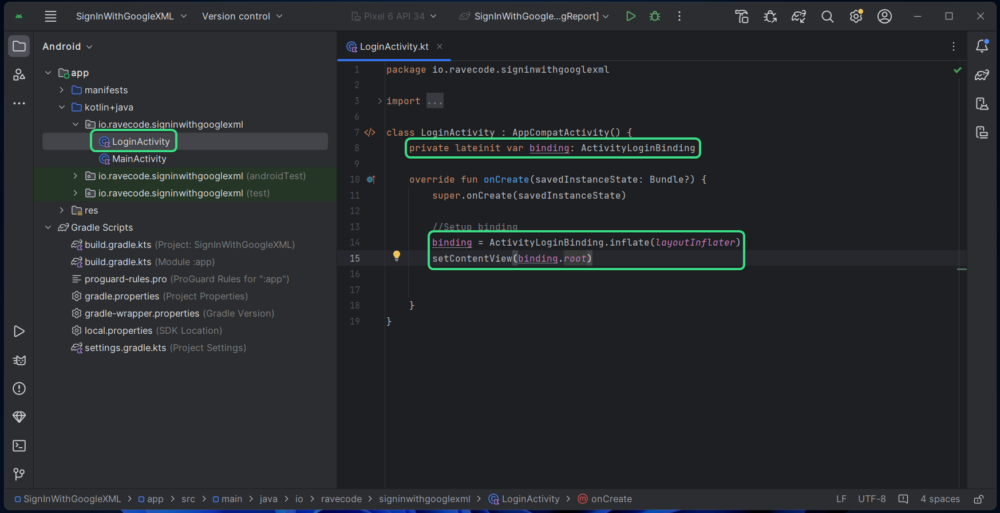
8.2 Initialize Firebase Auth
Now we need to initialize Firebase Auth.
private lateinit var firebaseAuth: FirebaseAuthfirebaseAuth = FirebaseAuth.getInstance()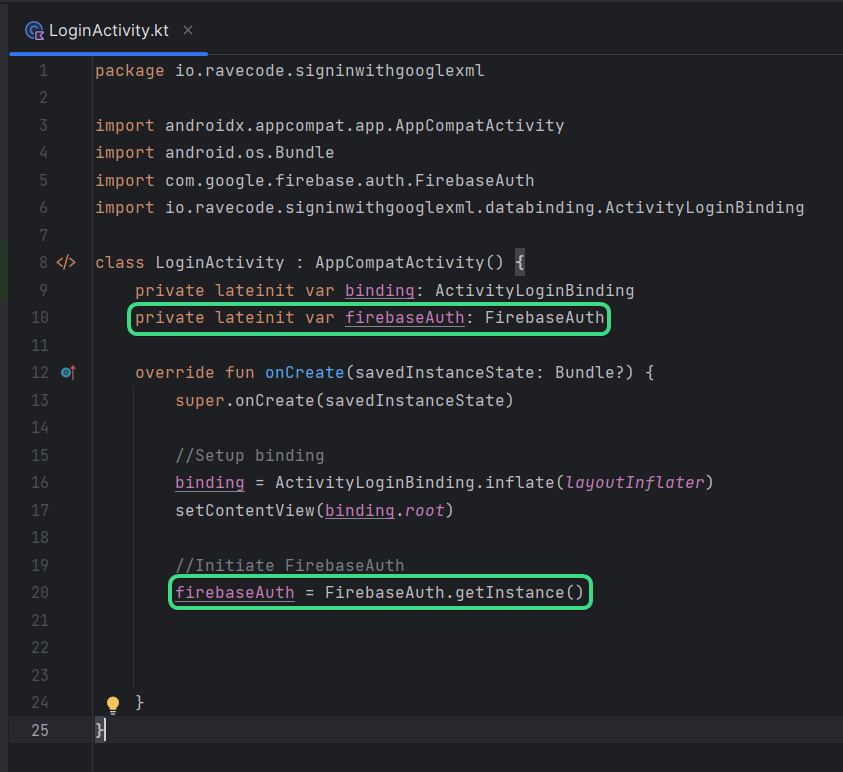
8.3 Initiate Google sign in client
Next get the Sign-in client with the client id.
private lateinit var mGoogleSignInClient: GoogleSignInClientval gso = GoogleSignInOptions.Builder(GoogleSignInOptions.DEFAULT_SIGN_IN)
.requestIdToken(getString(R.string.default_web_client_id))
.requestEmail()
.build()
mGoogleSignInClient= GoogleSignIn.getClient(this,gso)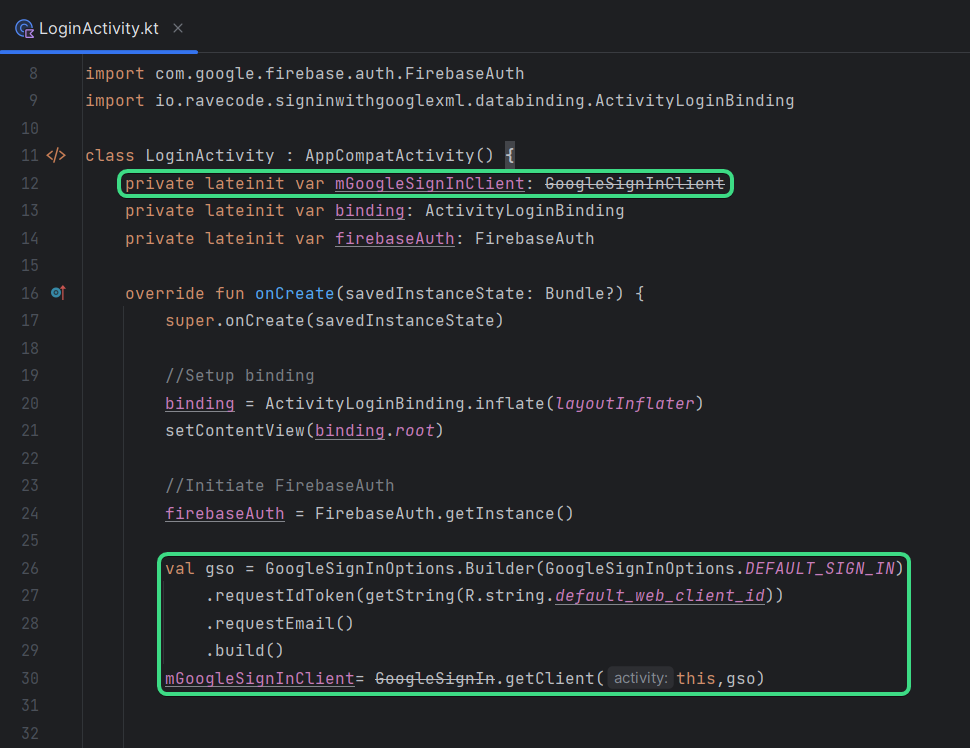
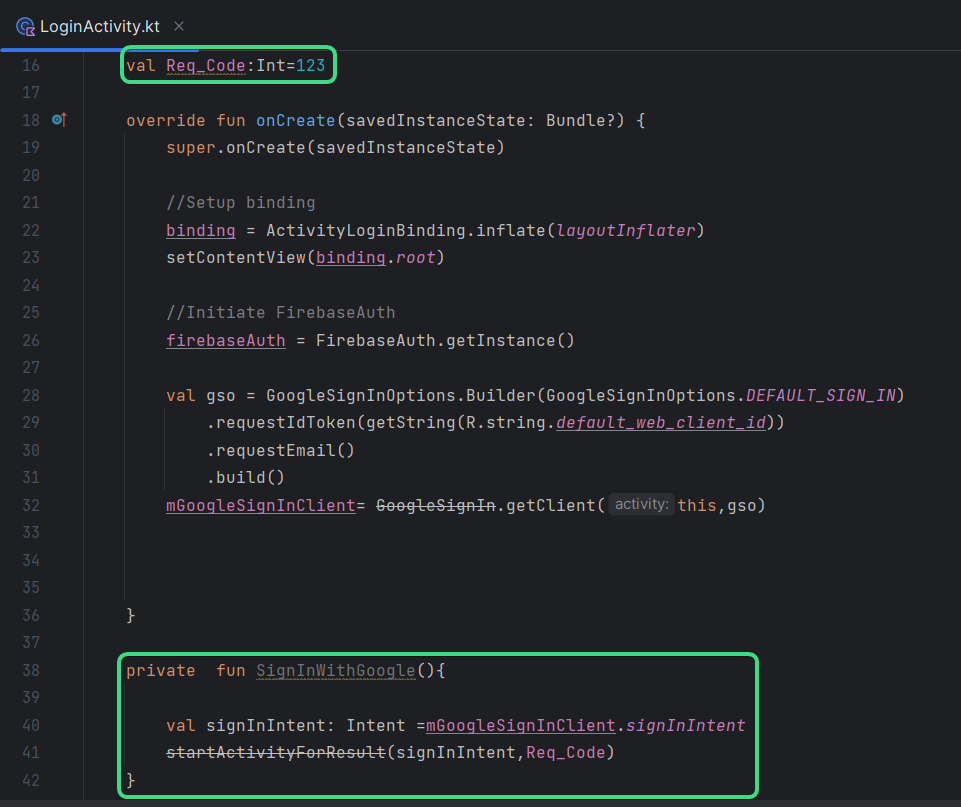
8.4 SignInWithGoogle()
Now we will create the signInWIthGoogle() function which will show the select account UI. You need to add a request code which you can set any random number and create a Intent with the GoogleSignInClient we created in last step.
private val reqCode:Int=123private fun signInWithGoogle(){
val signInIntent: Intent = mGoogleSignInClient.signInIntent
startActivityForResult(signInIntent,reqCode)
}
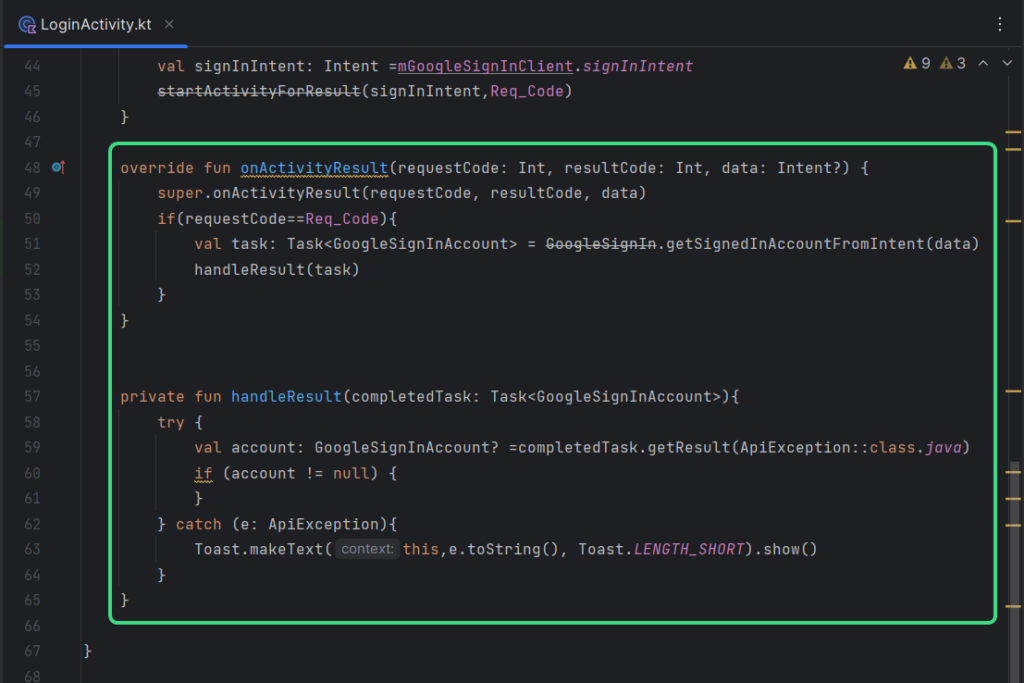
8.5 Handle the result
Now we will handle the result, which we will receive after user selects the Account.
override fun onActivityResult(requestCode: Int, resultCode: Int, data: Intent?) {
super.onActivityResult(requestCode, resultCode, data)
if(requestCode==reqCode){
val task: Task<GoogleSignInAccount> = GoogleSignIn.getSignedInAccountFromIntent(data)
handleResult(task)
}
}
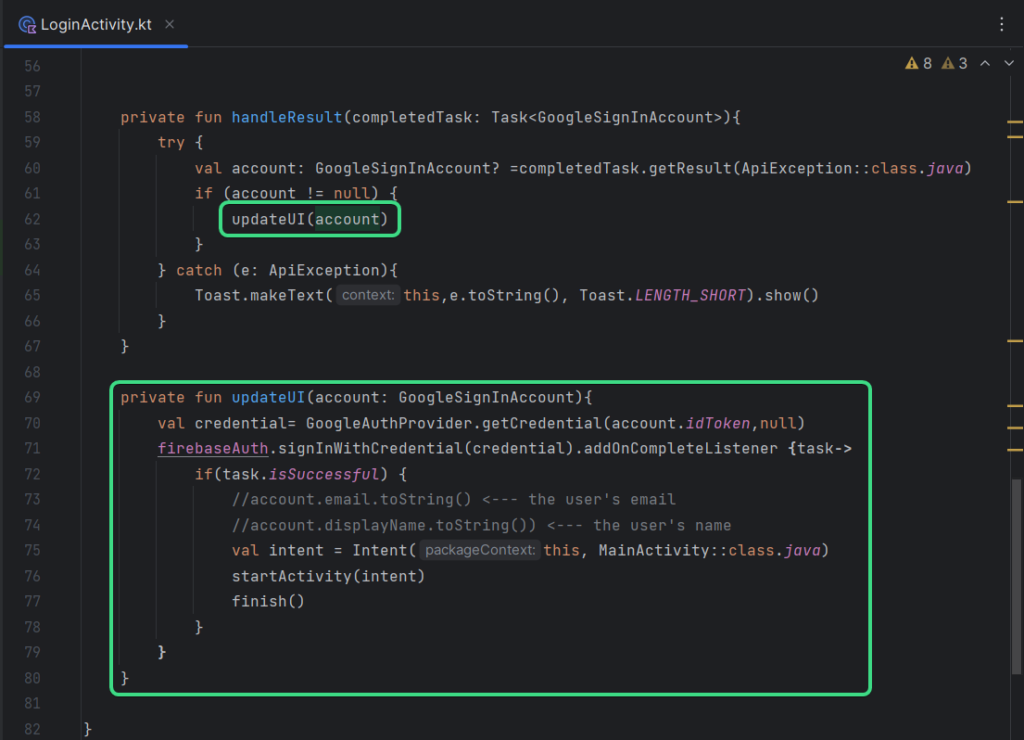
private fun handleResult(completedTask: Task<GoogleSignInAccount>){
try {
val account: GoogleSignInAccount? =completedTask.getResult(ApiException::class.java)
if (account != null) {
updateUI(account)
}
} catch (e: ApiException){
Toast.makeText(this,e.toString(), Toast.LENGTH_SHORT).show()
}
}
8.6 Update the UI
Next, after a successful authentication, we will update the UI, that is move the user to MainActivity.
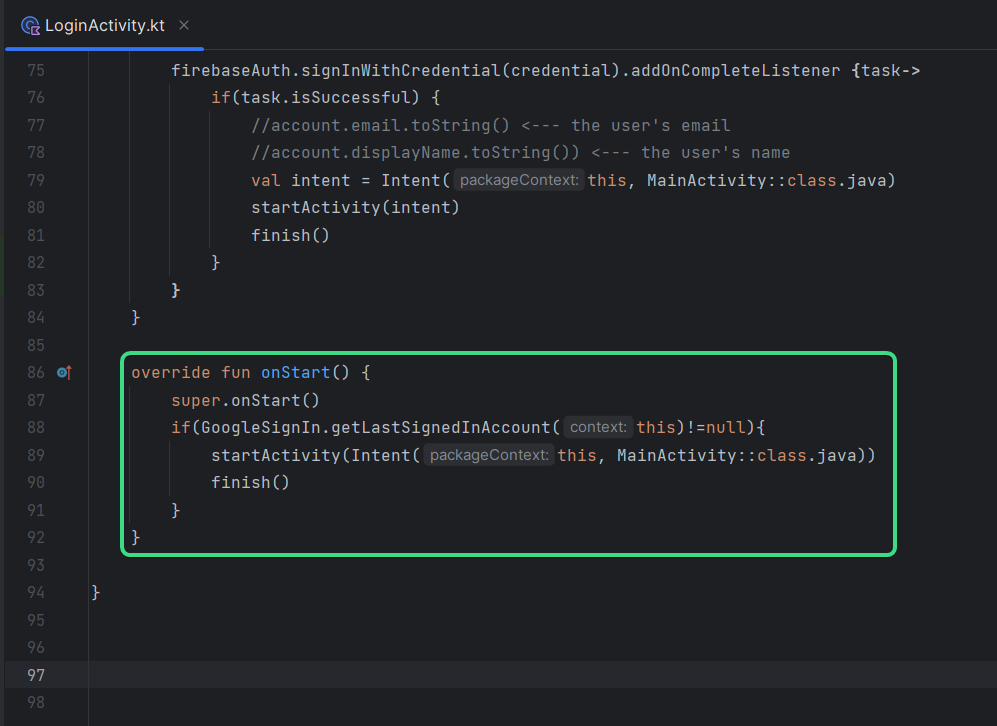
private fun updateUI(account: GoogleSignInAccount){
        val credential= GoogleAuthProvider.getCredential(account.idToken,null)
        firebaseAuth.signInWithCredential(credential).addOnCompleteListener {task->
            if(task.isSuccessful) {
                //account.email.toString() <--- the user's email
                //account.displayName.toString()) <--- the user's name
                val intent = Intent(this, MainActivity::class.java)
                startActivity(intent)
                finish()
            }
        }
    }
8.7 Set onClickListener to sign in button
Now our authentication flow is ready, just add a onClickListener to the sign-in button to run the signInWithGoogle() function.
binding.signIn.setOnClickListener{
            Toast.makeText(this,"Logging In", Toast.LENGTH_SHORT).show()
            signInWithGoogle()
        }
8.8 Move to MainActivity if user is already logged in
Next, we will move the user directly to the MainActivity if the user has already Authenticated previously.
override fun onStart() {
        super.onStart()
        if(GoogleSignIn.getLastSignedInAccount(this)!=null){
            startActivity(Intent(this, MainActivity::class.java))
            finish()
        }
    }
That’s all you need to do to add sign-in with Google in your android app. Here’s is the final result.

Conclusion
This is how you add sign-in with Google in your android app.
Leave a Reply